# Brilliant Labs documentation — Halo and Frame (single file for LLMs)
Generated from the Markdown sources of https://docs.brilliant.xyz/
(sections: halo, frame). Index: /llms.txt
========================================================================
PAGE: Halo (https://docs.brilliant.xyz/halo/halo/)
DESCRIPTION: Technical documentation for the Brilliant Halo.
========================================================================

# Getting started with Halo
Whether you're using Halo with Noa, or making your own apps, you'll find everything you need to know about your Halo hardware here.
## How do I charge my Halo?
Your Halo will automatically start charging whenever the magnetic charging connector is attached to the charging pins. The white LED on the left arm will pulse while charging and remain on when fully charged.
## How do I connect to my Halo for the first time?
Attach the magnetic charger and Halo will automatically enter pairing mode — look for the flashing white LED. Then from any Halo-compatible app, such as Brilliant Noa, press **Scan for Halo** and follow the on-screen instructions to pair. Accept the pairing request on your phone (Android users may need to tap **Pair** twice).
## How do I put Halo into pairing mode?
Press and hold Halo's button for approximately 5 seconds until you hear a chime and the white LED starts flashing. Halo is now in pairing mode and ready to connect to a new device. Up to 5 devices can be paired with Halo.
## How do I adjust the display?
Slide the display mount left or right and tilt it up or down to line it up with your eye, then rotate the display lens to bring the image into focus. See [Fitting and focusing the display](/halo/using-halo#fitting-and-focusing-the-display) for more detail.
## What does the button do?
| Button action | What it does |
|:--------------|:-------------|
| Click | Wakes Halo from sleep. When awake, clicks are handled by the app you're using. |
| Hold for 2 seconds (beep) | Sleep |
| Hold for 5 seconds (chime) | Pairing mode |
See [Button controls](/halo/using-halo#button-controls) for the full list, including how to restart and factory reset Halo.
## How do I update my Halo?
Whenever firmware updates are available for your Halo, you'll be notified in your Brilliant Noa app. Ensure Halo is well charged before updating to prevent partial updates. Keep the app open and within close range of your Halo during the entire update.
## Where can I download Brilliant Noa?
Brilliant Noa is **coming soon** to both Apple App Store for iOS and Google Play Store for Android.
[]()
[]()
## Developer?
Get started making your own apps today. Follow the links below to familiarize yourself with the Halo hardware and the Brilliant SDK.
- [Brilliant SDK overview](/halo/halo-sdk)
- [Python SDK](/halo/halo-sdk-python)
- [Flutter SDK](/halo/halo-sdk-flutter)
- [Web Bluetooth SDK](/halo/halo-sdk-webbluetooth)
- [Lua API Reference](/halo/halo-sdk-lua)
- [Bluetooth LE Specifications](/halo/halo-sdk-bluetooth-specs)
========================================================================
PAGE: Using Halo (https://docs.brilliant.xyz/halo/using-halo/)
DESCRIPTION: How to fit and focus Halo's display, and how to use Halo's button.
========================================================================
# Using Halo
{: .no_toc }
---
This page covers the day-to-day operation of your Halo. For setup, charging and pairing, see [Getting started with Halo](/halo/halo). For technical details, see the [Hardware](/halo/hardware) page.
## Contents
{: .no_toc }
1. TOC
{:toc}
---
## Fitting and focusing the display

### Aligning the display with your eye
The display mount can be adjusted to align with your eye by sliding it left and right, and tilting it up and down. The display mount can be a little stiff when moving.
{: .note }
When the display mount is fully extended to the left it will stop moving. Do not try to extend it any further.
### Focusing the display
The display lens can be rotated to focus the display to your eyesight. The focus range covers +2 to −6 diopters.
{: .note }
Be careful not to keep rotating the display lens counter-clockwise — it will eventually come off the thread. If this happens, reattach it by placing the display lens onto the mount neck and rotating it clockwise, like a bottle top.
---
## Button controls

Halo has a button under the left arm for power, pairing, and app-defined functions.
| Button action | What it does |
|:--------------|:-------------|
| Click | Wakes Halo from sleep. When Halo is awake, clicks are handled by the app you're using — for example, Brilliant Noa uses them to control assistant conversations and note taking. |
| Hold for 2 seconds, until a beep | Sleep. Click the button to wake Halo. |
| Hold for 5 seconds, until a chime | Pairing mode. The white LED flashes and Halo stays in pairing mode for about a minute. Existing paired devices are kept, and up to 5 devices can be paired with Halo. |
| Hold the button, attach the magnetic charger, then release the button within 10 seconds | Restart |
| Hold for 15 seconds | Factory reset (see below) |
Releasing the button anywhere between 5 and 15 seconds just opens pairing mode — nothing is erased.
Apps can also respond to double clicks and long presses (held for 1 second and released before 2 seconds). Developers can find the details in the [Lua API reference](/halo/halo-sdk-lua#button).
### Factory reset
{: .warning }
Holding the button for 15 seconds wipes Halo's filesystem, removing all files including the list of paired devices and any installed app, and then places Halo into ship mode. Disconnect the charger before doing a factory reset.
In ship mode Halo is fully powered off and will not wake from a button click. Attach the magnetic charger to wake it.
A factory reset clears Halo's list of paired devices, but your phone or computer still remembers Halo. Before reconnecting, remove (forget) Halo in your phone's or computer's Bluetooth settings, otherwise pairing may fail with errors such as "Peer removed pairing information" or "Encryption is insufficient".
Recovery mode
If Halo won't start up or respond normally, recovery mode erases its storage and lets you reinstall firmware.
1. Hold the button, then attach the magnetic charger while still holding it.
1. Keep holding for 10 seconds after attaching the charger, then release.
1. The white LED blinks slowly on and off (1 second on, 1 second off), instead of the gradual pulse it shows while charging. Halo is now in recovery mode. Only firmware updates are possible, using an SMP (MCUmgr) firmware update tool — see [Firmware updates](/halo/halo-sdk-bluetooth-specs/#firmware-updates).
{: .warning }
Entering recovery mode also performs a factory reset, erasing all files and paired devices. Forget Halo in your phone's or computer's Bluetooth settings before reconnecting.
To leave recovery mode, click the button. Halo also restarts by itself after 2 minutes without a Bluetooth connection.
========================================================================
PAGE: Hardware (https://docs.brilliant.xyz/halo/hardware/)
DESCRIPTION: A brief overview of how Halo works under the hood.
========================================================================
# Halo Hardware Manual
{: .no_toc }
---

Here you'll find all the details about how Halo works under the hood. For software related information, be sure to also check out the [Brilliant SDK](/halo/halo-sdk) including [Lua API](/halo/halo-sdk-lua/) pages.
## Key features
{: .no_toc }
- 0.2" color OLEDoS micro-display (256x256px drawable area)
- 640x480 global shutter color camera
- Stereo microphones
- Stereo bone conduction speakers
- Arm Cortex-M55 CPU, Arm Ethos-U55 NPU
- Bluetooth LE 5.3
- 300mAh built-in rechargeable li-ion battery (2×150mAh cells)
- 3 axis accelerometer with tap detection
- 3 axis e-compass
- Full featured Zephyr OS with Lua VM
- Magnetic charging connector
## Example uses:
{: .no_toc }
- Generative AI on the go
- Heads up telemetry
- AR app & game design
- Voice interaction
- Computer vision research
## Contents
{: .no_toc }
1. TOC
{:toc}
## Hardware block diagram
This diagram shows a general overview of the Halo internal hardware architecture.

---
## Bluetooth MCU
The Bluetooth MCU serves as the main processor for Halo. It handles all network communication and running of user logic. The MCU used is the [Balletto B1](https://alifsemi.com/products/family/balletto/) from Alif Semiconductor. It contains a 32bit Arm Cortex-M55 CPU, Arm Ethos-U55 Neural Processing Unit (NPU), 1.8 MB of MRAM flash storage, 2.0 MB of SRAM, and features Bluetooth LE 5.3 connectivity.
As standard, Halo runs Zephyr OS and a Lua VM that allows for scripting and remote access fully over Bluetooth. No programming cables, or proprietary software is needed to use the device.
The firmware is fully updatable over the air (OTA) using MCUboot and BLE. If you're using a Halo-compatible app, these updates should be automatic, however if you're developing your own apps, take a look at the [Halo SDK Bluetooth Specs page](/halo/halo-sdk-bluetooth-specs/#firmware-updates) to see how you can implement firmware update capability into your own apps.
### Customizing the firmware
Halo is intended to be used with the officially provided firmware from Brilliant, however it is possible to customize the firmware if desired.
If you wish to view the source code, or use it as a starting point for your custom firmware, visit the [Halo codebase repository (coming soon)]().
---
## Display
The display used in Halo is the full RGB color [VGA020](https://www.gzot.com/en/product_details/22) OLEDoS (OLED on Silicon) micro-display from Guozhao Optoelectronics. It features 640×480 RGB pixels on a 0.2" panel with a 6.3μm pixel pitch, mounted to the top of Halo's frame. It delivers full RGB color, a 10000:1 contrast ratio, 256 grayscale levels, up to 5000 nit peak brightness, and a refresh rate of 25–120Hz. It connects via MIPI (2-lane D-PHY) or Quad SPI.
Unlike Frame, Halo's display has no double-buffer — draw calls take effect immediately, and no `show()` call is required.

---
## Camera
The front facing camera on Halo is the [PAG7982J1](https://www.pixart.com/products-detail/163/PAG7982J1) from PixArt Imaging — a compact VGA color camera module with a global shutter. It captures 640×480 images with an 81.2° horizontal field of view, and consumes just 40mW at full frame rate. The global shutter eliminates rolling shutter artefacts, making it well suited to computer vision applications.
Images are processed using the [libmpix](https://libmpix.org/) pipeline, allowing a configurable camera processing chain. To better understand how the camera subsystem of Halo works, check out the [camera section](/halo/halo-sdk-lua/#camera) in the Lua section of the Brilliant SDK.

---
## Microphones
Halo features dual T5838 MEMS microphones from TDK. It has an exceptionally wide dynamic range with an SNR of 68 dBA and an acoustic overload point of 133 dB SPL, allowing it to hear everything from soft speech to loud booming noises. The digital PDM output connects directly to the Bluetooth MCU.
The microphones support multiple power modes — from a 310 µA high quality mode down to a 20 µA always-on mode for Audio Activity Detection (AAD) wake detection. The standard firmware allows for recording formats including PCM and LC3, with configurable sample rates.

---
## Speakers
Halo features stereo bone conduction speakers from Thor Innovation, driven by a [TPA2011D1](https://www.ti.com/product/TPA2011D1) 3.2W mono Class-D audio power amplifier from Texas Instruments. The TPA2011D1 is a filter-free Class-D amp in a tiny 1.21×1.16mm DSBGA package, with 95% efficiency, 1.5mA quiescent current, and auto-recovering short-circuit and thermal overload protection. Audio data is streamed from the host to Halo over a dedicated Bluetooth AUDIO TX characteristic, bypassing the Lua VM for low-latency delivery. Both PCM and LC3 audio formats are supported.

---
## Motion Sensor (IMU)
Halo's motion sensing uses two sensors working together. The accelerometer is the [BMA580](https://www.bosch-sensortec.com/products/motion-sensors/accelerometers/bma580/) from Bosch Sensortec — a triaxial 16-bit accelerometer with configurable ±2/4/8/16g range, SPI/I²C/I3C interface, and just 125 µA typical current consumption. It includes an on-chip interrupt engine with single, double and triple tap detection. The e-compass is the [QMC6308](https://www.qst.com.cn/product_detail/id/130.html) from QST — a 3-axis magnetometer with ±3mT range, 16-bit resolution, and I²C interface consuming just 30 µA. Further processing on the Bluetooth MCU calculates the raw X, Y and Z values of both sensing elements into angular values for detecting head position.
An accelerometer interrupt line is also directly connected to the Bluetooth MCU. This allows for always on detection of taps that can be used to navigate and select UI elements within the user's apps.

---
## Button
Halo has a button placed under the left arm for convenient access for power on/off, pairing, and user-programmable functions.
See [Button controls](/halo/using-halo#button-controls) for the default button functions.

---
## Power
### Battery charging
Halo uses the [BQ25170](https://www.ti.com/product/BQ25170) from Texas Instruments — a dedicated 800mA linear battery charger for 1-cell Li-Ion, Li-Polymer, and LiFePO4 batteries. It charges the two built-in [GRP1654M1](https://www.grepow.com/button-cell-battery/grp1654.html) NMC li-ion button cells from Grepow (150mAh each, 300mAh total, 3.7V nominal). Charge voltage and current are set via external resistors, and an NTC thermistor input monitors battery temperature to protect the cells during charging. The cells are rated for 1000+ charge cycles and support charging between 0°C and +45°C.
### Charger
Halo uses a magnetic connector for convenient charging over USB Type-C.

---
## Mechanical
### Halo
[Download the 3D Model in STL format](/halo/halo.stl)
The model contains the full Halo assembly — the front, both lenses, and both temple arms in the open position.
---
## Safety & limitation of liability
### Safety
Brilliant Labs' devices can obscure your vision and should not be used while driving or operating dangerous equipment. Additionally long periods of use may cause eye strain, headaches and motion sickness. Brilliant Labs' devices can also display bright flashing images so may not be suitable for those who are susceptible to light sensitivity.
### Critical applications
Brilliant Labs' devices are intended for consumer and R&D applications. It is not verified for use where performance and accuracy would be critical to human health, safety or mission critical use.
### Lithium batteries
Lithium batteries can be dangerous if mishandled. Do not expose Brilliant Labs' devices to excess temperatures, fire or liquids. Do not try to remove the battery as the terminals can become shorted and result in the battery overheating or catching fire. Once the product reaches the end of it's life, dispose it safely according to your local regulations, such as e-waste collection points where any volatile components can be properly contained and handled.
### FCC notice
This device complies with part 15 of the FCC Rules. Operation is subject to the following two conditions: (1) This device may not cause harmful interference, and (2) this device must accept any interference received, including interference that may cause undesired operation.
Any Changes or modifications not expressly approved by the party responsible for compliance could void the user's authority to operate the equipment. Note: This equipment has been tested and found to comply with the limits for a Class B digital device, pursuant to part 15 of the FCC Rules. These limits are designed to provide reasonable protection against harmful interference in a residential installation. This equipment generates uses and can radiate radio frequency energy and, if not installed and used in accordance with the instructions, may cause harmful interference to radio communications. However, there is no guarantee that interference will not occur in a particular installation. If this equipment does cause harmful interference to radio or television reception, which can be determined by turning the equipment off and on, the user is encouraged to try to correct the interference by one or more of the following measures:
- Reorient or relocate the receiving antenna.
- Increase the separation between the equipment and receiver.
- Connect the equipment into an outlet on a circuit different from that to which the receiver is connected.
- Consult the dealer or an experienced radio/TV technician for help.
The device has been evaluated to meet general RF exposure requirement. The device can be used in portable exposure condition without restriction.
### Limitation of liability
Brilliant Labs provides technical data, including design resources, examples, applications, design advice, tools, safety information and other resources "as is" and disclaims all warranties, express and implied, including without limitation any implied warranties or merchantability, fitness for a particular purpose or non-infringement of third party intellectual property rights.
These resources are intended for skilled developers. You are solely responsible for selecting the appropriate products for your application, designing, validating and testing your application, and ensuring your application meets applicable standards, and other safety, security, regulatory or other requirements.
Brilliant Labs reserves the right to change the circuitry and specifications without notice at any time. The parametric values quoted in this manual are provided for guidance only.
The resources and products are provided subject to our [terms and conditions](https://brilliant.xyz/pages/terms-conditions).
========================================================================
PAGE: Brilliant SDK (https://docs.brilliant.xyz/halo/halo-sdk/)
DESCRIPTION: A guide on how to develop your own applications for Halo.
========================================================================
# Building Apps with the Brilliant SDK
{: .no_toc }
{: .note }
Migrating from the Frame SDK? See the Migration guides for [Python](https://github.com/brilliantlabsAR/brilliant_sdk/blob/main/python/MIGRATION.md), [Flutter](https://github.com/brilliantlabsAR/brilliant_sdk/blob/main/flutter/MIGRATION.md) and [Web Bluetooth](https://github.com/brilliantlabsAR/brilliant_sdk/blob/main/webbluetooth/MIGRATION.md).
---
1. TOC
{:toc}
---
## How Do Apps Run on Halo?
Halo runs a power-efficient System-on-a-Chip (SoC) with relatively limited memory and processing power compared to modern smartphones. Rather than installing apps directly on Halo, it typically functions as a peripheral accessory for "host" apps running on computers or mobile devices. These host apps communicate with Halo via Bluetooth to control features like the camera, microphone, speakers, and display.
While you may write Lua scripts that execute on Halo for specific behaviors, your host app primarily drives the logic while Halo typically runs a simple event handler loop. For example, the Noa mobile app connects to Halo, receives sensor data over Bluetooth, processes it, and sends content back to Halo for display.
Halo doesn't have its own app launcher or traditional app installation system. To share your Halo apps with others, publish your host app through normal distribution channels like App Store, Google Play, GitHub, or open source repositories. If you build something cool, let us know and we'll be happy to share it with the community.
## Getting Started
For the quickest start:
* If you're using a supported platform, begin with the SDK documentation for [Python](/halo/halo-sdk-python), [Flutter](/halo/halo-sdk-flutter), or [Web Bluetooth](/halo/halo-sdk-webbluetooth), and run the example programs. Then explore the [Lua API](/halo/halo-sdk-lua) for advanced features.
* For other platforms, use the [Lua API](/halo/halo-sdk-lua) directly over Bluetooth using the [Bluetooth LE API documentation](/halo/halo-sdk-bluetooth-specs).
## Development Options for Halo
1. **Use the Brilliant SDK** (Recommended)
* Build with supported platforms:
* [Python](/halo/halo-sdk-python) (Mac, Linux, Windows)
* [Flutter](/halo/halo-sdk-flutter) (iOS/Android)
* [Web Bluetooth](/halo/halo-sdk-webbluetooth) (Chromium browsers on desktop/Android)
* Benefits: common tasks are simplified, many examples to follow, experimental emulator available for Python
2. **Communicate via Bluetooth LE**
* Use any platform with Bluetooth LE capabilities
* Offers full control but requires Bluetooth LE development experience
* See the [Bluetooth LE API documentation](/halo/halo-sdk-bluetooth-specs)
3. **Customize Firmware** (Advanced)
* Requires hardware development expertise
* Provides complete control of Halo hardware
* Find the official firmware [on GitHub](https://github.com/brilliantlabsAR/halo-firmware)
The typical development pattern involves creating a Python desktop application or Flutter mobile app that uses the Brilliant SDK to communicate with Halo over Bluetooth Low Energy, abstracting away the Lua and BLE details.
## Development with the Brilliant SDK
{: .note }
This recommended approach offers quick and reliable Halo app development for Python, Flutter, and Web Bluetooth platforms, all under active development.
Our platform SDKs simplify the low-level Bluetooth and Lua APIs, eliminating the need to write boilerplate code for device discovery, connection, and communication.
Familiarity with the [Lua API](/halo/halo-sdk-lua) remains useful for main application event loops, `main.lua` scripts that run at wakeup, and custom on-device processing.
Check the [Python](/halo/halo-sdk-python), [Flutter](/halo/halo-sdk-flutter), or [Web Bluetooth](/halo/halo-sdk-webbluetooth) SDK documentation for implementation details.
## Direct Bluetooth LE Development
For developers comfortable with Bluetooth LE, this approach offers maximum flexibility and requires understanding how Bluetooth LE works.
After establishing BLE communication, you'll use Lua to control Halo's functions. Halo provides a Lua 5.4 virtual machine where you can execute scripts or use the Lua REPL over the BLE interface.
Refer to the [Bluetooth LE API documentation](/halo/halo-sdk-bluetooth-specs) and the [full Lua API reference](/halo/halo-sdk-lua) for details on Halo's capabilities.
## Firmware Customization
Halo is developed by hackers for hackers, so even though we don't recommend it for most users, Halo's open-source firmware can be customized. Find the official firmware [on GitHub (coming soon)]().
========================================================================
PAGE: Python (https://docs.brilliant.xyz/halo/halo-sdk-python/)
DESCRIPTION: An overview of the Brilliant SDK for building Python apps that talk to Brilliant Halo.
========================================================================
# Brilliant SDK for Python
{: .no_toc }
---
The Brilliant SDK for Python is available in a low-level library ([brilliant-ble](https://pypi.org/project/brilliant-ble/)) for Bluetooth LE connectivity using [Bleak](https://github.com/hbldh/bleak), an application-level library ([brilliant-msg](https://pypi.org/project/brilliant-msg/)) for passing rich objects between your host program and Halo — such as images, streamed audio, and rasterized text — and an experimental software emulator ([halo-emulator](https://github.com/brilliantlabsAR/brilliant_sdk/tree/halo/python/packages/halo_emulator)) for developing and testing Halo apps without any hardware.
The Brilliant SDK for Python also supports **Frame** devices. `brilliant-ble` automatically detects whether the connected device is a Halo or a Frame at connection time.
---
1. TOC
{:toc}
---
## `brilliant-ble` package: low-level connectivity
| [](https://pypi.org/project/brilliant-ble/){:target="_blank"} | [API Reference](https://brilliant-ble.readthedocs.io/){:target="_blank"} | [Source](https://github.com/brilliantlabsAR/brilliant_sdk/tree/main/python/packages/brilliant_ble){:target="_blank"} |
The `BrilliantBle` class connects to Halo (or Frame), initiating pairing if required. Lua strings can be sent for execution, optionally returning their results. Transmitted strings must be shorter than `BrilliantBle.max_lua_payload()`.
[Halo-specific Lua APIs](/halo/halo-sdk-lua) can be called to draw on the display, sample the IMU, set button and data callbacks, control the microphone and speaker, and more.
In addition to Lua strings, `BrilliantBle` can send control commands (break, reset, remove) and custom user data messages handled by a data callback on Halo. See [Talking to Halo Over Bluetooth](/halo/halo-sdk-bluetooth-specs) for more details.
**Halo-specific features in `brilliant-ble` 2.0.0:**
- `BrilliantBle.type` — detected `BrilliantDeviceType` (`FRAME`, `HALO`, or `UNKNOWN`) after connection
- `send_audio(data)` — writes LC3 or PCM audio to the Halo audio characteristic
- `send_remove_signal()` — sends `0x05` to remove `main.lua` and reset the Lua VM
- `send_data(await_data=True)` — receiver-paced flow control using ACK bytes from the device
### Example usage
{: .no_toc }
```bash
uv add brilliant-ble
# or: pip install brilliant-ble
```
```python
import asyncio
from brilliant_ble import BrilliantBle
async def main():
frame = BrilliantBle()
try:
await frame.connect()
print(f"Connected to: {frame.type}") # BrilliantDeviceType.HALO
await frame.send_lua(
"frame.display.text('Hello, Halo!', 50, 50); print(nil)",
await_print=True
)
await frame.disconnect()
except Exception as e:
print(f"Not connected to Halo: {e}")
if __name__ == "__main__":
asyncio.run(main())
```
---
## `brilliant-msg` package: application-level messaging
| [](https://pypi.org/project/brilliant-msg/){:target="_blank"} | [API Reference](https://brilliant-msg.readthedocs.io/){:target="_blank"} | [Source](https://github.com/brilliantlabsAR/brilliant_sdk/tree/main/python/packages/brilliant_msg){:target="_blank"} |
`brilliant-msg` enables the host and Halo-side halves of an application to **communicate using richly typed messages** — for example transmitting sprites to Halo with width, height, palette data, and pixel data as a single object.
`brilliant-msg` uses a programming model in which **a main event loop runs on Halo**. Messages are exchanged asynchronously and handled in an event-driven way. This makes it practical to build applications that simultaneously stream audio from Halo to the host *and* send display content back to Halo.
### How it works
{: .no_toc }
Large objects are serialized into multiple Bluetooth packets marked with a `msg_code`, and **efficiently reassembled on the device**. After parsing, the complete object is delivered to the Lua main loop.
* **`Tx` message types** — packing (Python) + parsing (Lua) — e.g. `TxSprite.pack()` + `sprite.lua`
* **`Rx` message types** — parsing (Python) + implicit serialization in Lua — e.g. `RxPhoto` + `camera.lua`
**Key changes for Halo in `brilliant-msg` 6.0.0:**
- `RxClick` — Halo button click events (`single`, `double`, `long`), msg code `0x0B`
- `data.lua` — queue-based message ordering with ACK byte flow control
- `imu.lua` — 6 × `float32` IMU values with Halo-specific axis mapping
- `sprite.lua` — Halo uses integer palette indices (0–15); Frame uses named color strings
- `audio.lua` — updated for Halo audio streaming
### Startup sequence
{: .no_toc }
`brilliant-msg` applications follow a standard sequence:
1. Send break/reset/break signals to ensure Halo is in Lua REPL mode
2. Upload standard Lua libraries (`data`, `sprite`, `plain_text`, etc.)
3. Upload the main Lua application file
4. Start the Halo-side event loop (after which, no REPL commands are accepted)
5. Exchange messages asynchronously
### Example usage
{: .no_toc }
```bash
uv add brilliant-msg
# or: pip install brilliant-msg
```
`sprite_display.py`
```python
import asyncio
from pathlib import Path
from brilliant_msg import BrilliantMsg, TxSprite
async def main():
frame = BrilliantMsg()
try:
await frame.connect()
await frame.print_short_text('Loading...')
# Upload Lua libraries and main app
await frame.upload_stdlua_libs(lib_names=['data', 'sprite'])
await frame.upload_frame_app(local_filename="lua/halo_app.lua")
frame.attach_print_response_handler()
await frame.start_frame_app()
# Send a 4-bit indexed PNG sprite to Halo
sprite = TxSprite.from_indexed_png_bytes(Path("images/logo_4bit.png").read_bytes())
await frame.send_message(0x20, sprite.pack())
await asyncio.sleep(5.0)
frame.detach_print_response_handler()
await frame.stop_frame_app()
except Exception as e:
print(f"An error occurred: {e}")
finally:
await frame.disconnect()
if __name__ == "__main__":
asyncio.run(main())
```
`lua/halo_app.lua`
```lua
local data = require('data.min')
local sprite = require('sprite.min')
USER_SPRITE = 0x20
function app_loop()
frame.display.power_save(false)
frame.display.clear()
print('Halo app is running')
while true do
rc, err = pcall(function()
local items = data.process_raw_items()
for _, item in ipairs(items) do
local msg_code, raw = item[1], item[2]
if msg_code == USER_SPRITE then
local spr = sprite.parse_sprite(raw)
frame.display.bitmap(1, 1, spr.width, 2^spr.bpp, 0, spr.pixel_data, {palette_data=spr.palette_data})
end
end
frame.sleep(0.001)
end)
if rc == false then
print(err)
frame.display.clear()
break
end
end
end
app_loop()
```
| Selected Message Types | Description |
|------------------------|-------------|
| `TxSprite` | Send an indexed-color PNG image for display |
| `TxCaptureSettings` | Request a photo from the camera |
| `RxPhoto` | Receive a JPEG photo from the camera |
| `RxAudio` | Receive a PCM or LC3 audio stream |
| `RxIMU` | Receive accelerometer and magnetometer readings |
| `RxClick` | Receive Halo button click events (single / double / long) |
---
## `halo-emulator` package: develop without hardware (experimental)
| [Source](https://github.com/brilliantlabsAR/brilliant_sdk/tree/halo/python/packages/halo_emulator){:target="_blank"} |
The `halo-emulator` package embeds a full Lua 5.4 runtime and replaces all `frame.*` calls with Python stubs, rendering display output to a 256×256 pixel buffer. This lets you develop, test, and debug Halo Lua apps entirely in software — no hardware required.
**Key features:**
- Full Lua 5.4 runtime via [lupa](https://github.com/scoder/lupa) — run unmodified Halo Lua scripts
- Virtual 256×256 display — all drawing primitives, palette, text, and bitmap rendering
- Event injection — trigger BLE data, button presses, and IMU taps from Python
- Test-friendly — inspect the framebuffer as a PIL `Image`, capture `bluetooth.send()` calls
- Interactive REPL — `halo-emulator ./app/` opens a live pygame window and Python REPL
- Sandboxed filesystem — `frame.file.*` operations run against a real directory
### Installation
{: .no_toc }
`halo-emulator` is not published to PyPI. Install it by cloning the `brilliant_sdk` repository — see [Installing from source](#installing-from-source) below.
### Quick start
{: .no_toc }
```python
from halo_emulator import HaloEmulator
with HaloEmulator(sandbox_dir='./my_app') as emu:
emu.load_directory('./my_app') # copy .lua files into sandbox
emu.start('main.lua')
emu.wait(timeout=5.0)
img = emu.get_framebuffer() # PIL Image (256×256 RGBA)
img.save('output.png')
```
### Interactive REPL
{: .no_toc }
```bash
halo-emulator ./my_app/
```
Opens a 512×512 pygame window (2× scaled) with a Python REPL. Keyboard shortcuts:
| Key | Action |
|-----|--------|
| `Space` | Button single click |
| `D` | Button double click |
| `L` | Button long press |
| `T` | IMU tap |
```bash
halo-emulator ./my_app/ --script frame_app.lua # specify entry point
halo-emulator ./my_app/ --headless # REPL only, no window
```
### Event injection
{: .no_toc }
```python
emu.inject_bluetooth_data(b'\x0a\x00\x05Hello') # triggers receive_callback
emu.inject_button_single() # triggers button.single callback
emu.inject_button_double() # triggers button.double callback
emu.inject_button_long() # triggers button.long callback
emu.inject_imu_tap() # triggers imu.tap_callback
```
### State configuration
{: .no_toc }
```python
emu.set_battery_level(42)
emu.set_battery_charging(True)
emu.set_imu_direction(pitch=15.0, roll=-5.0, heading=0.0)
emu.set_imu_raw(compass=(10, 20, 30), accel=(0, 0, 1000))
```
### Writing automated tests
{: .no_toc }
```python
import time, pytest
from halo_emulator import HaloEmulator
@pytest.fixture
def emulator(tmp_path):
emu = HaloEmulator(sandbox_dir=tmp_path, print_handler=None)
yield emu
if emu.is_running():
emu.stop()
def test_display_shows_text(emulator, tmp_path):
(tmp_path / 'main.lua').write_text("""
frame.display.text('Hello', 10, 10, 0xFFFFFF)
""")
emulator.start()
emulator.wait(timeout=3.0)
img = emulator.get_framebuffer()
pixels = list(img.getdata())
bright = sum(1 for r, g, b, a in pixels if r + g + b > 30)
assert bright > 0
def test_button_press_triggers_callback(emulator, tmp_path):
(tmp_path / 'main.lua').write_text("""
frame.button.single(function()
frame.bluetooth.send('\x01')
end)
frame.sleep(5.0)
""")
emulator.start()
time.sleep(0.1)
emulator.inject_button_single()
time.sleep(0.2)
assert b'\x01' in emulator.get_bluetooth_sent()
```
Run tests from the workspace root:
```bash
cd python
uv sync --all-packages --all-extras
uv run pytest packages/brilliant_msg/tests/ packages/halo_emulator/tests/
```
---
## Installing from source
When working from the `brilliant_sdk` repository, install all packages as editable installs so local changes are immediately reflected:
```bash
git clone https://github.com/brilliantlabsAR/brilliant_sdk.git
cd brilliant_sdk/python
uv sync --all-packages
```
The `uv` workspace configuration ensures `brilliant-ble` and `brilliant-msg` resolve to local packages rather than PyPI.
========================================================================
PAGE: Flutter (https://docs.brilliant.xyz/halo/halo-sdk-flutter/)
DESCRIPTION: An overview of the Brilliant SDK for building Flutter mobile apps that talk to Brilliant Halo.
========================================================================
# Brilliant SDK for Flutter
{: .no_toc }
---
The Brilliant SDK for Flutter is available in a low-level library ([brilliant_ble](https://pub.dev/packages/brilliant_ble/)) for Bluetooth LE connectivity, and an application-level library ([brilliant_msg](https://pub.dev/packages/brilliant_msg/)) for passing rich objects between your host app and Halo — such as images, streamed audio, and rasterized text.
For rapid app development, the [simple_brilliant_app](https://pub.dev/packages/simple_brilliant_app) package provides scaffolding for single-page Flutter apps that work with both Halo and Frame. A convenience meta-package ([brilliant_sdk](https://pub.dev/packages/brilliant_sdk)) bundles `brilliant_ble` and `brilliant_msg` together.
The Brilliant SDK for Flutter also supports **Frame** devices. `brilliant_ble` automatically detects whether the connected device is a Halo or a Frame at connection time.
---
1. TOC
{:toc}
---
## `brilliant_ble` package: low-level connectivity
| [](https://pub.dev/packages/brilliant_ble){:target="_blank"} | [API Reference](https://pub.dev/documentation/brilliant_ble/latest/){:target="_blank"} | [Source](https://github.com/brilliantlabsAR/brilliant_sdk/tree/main/flutter/packages/brilliant_ble){:target="_blank"} |
The `BrilliantBluetooth` class connects to Halo (or Frame), initiating pairing if required. A sequence of Lua strings can be sent to the device for execution, optionally returning their results. Transmitted strings must be shorter than the Bluetooth MTU (`BrilliantDevice.maxStringLength()`).
[Halo-specific Lua APIs](/halo/halo-sdk-lua) can be called to draw on the display, sample the IMU, set button and data callbacks, control the microphone and speaker, and more.
In addition to Lua strings, `BrilliantDevice` can send control commands (break, reset, remove) and custom user data messages handled by a callback on the device.
**Halo-specific features in `brilliant_ble` 4.0.0:**
- `BrilliantDeviceType` enum (`frame`, `halo`, `unknown`) — detected automatically at connection time
- `BrilliantDevice.type` getter
- `BrilliantDevice.audioTxChannel` — Halo-specific BLE characteristic for audio output
- `BrilliantDevice.isLuaInReplState()` — probe to check if the Lua REPL is active
- `BrilliantBluetooth.getSystemConnectedDevice(uuid)` — check for an existing OS-level connection
- Android: MTU 517 negotiation, high connection priority, 2M PHY, bond creation
- Android: fixed spurious reconnects after user-initiated disconnects
### Example usage
{: .no_toc }
```dart
import 'package:brilliant_ble/brilliant_ble.dart';
// Scan and connect
BrilliantScannedDevice? scannedDevice = await BrilliantBluetooth.scan().first;
BrilliantDevice device = await BrilliantBluetooth.connect(scannedDevice);
print('Connected to: ${device.type}'); // BrilliantDeviceType.halo
// Send a break signal to stop any running Lua loop
await device.sendBreakSignal();
// Send Lua to draw text and print confirmation
await device.sendString(
'frame.display.text("Hello, Halo!", 50, 100, 0xFFFFFF); print("done")',
awaitResponse: true,
);
```
---
## `brilliant_msg` package: application-level messaging
| [](https://pub.dev/packages/brilliant_msg){:target="_blank"} | [API Reference](https://pub.dev/documentation/brilliant_msg/latest/){:target="_blank"} | [Source](https://github.com/brilliantlabsAR/brilliant_sdk/tree/main/flutter/packages/brilliant_msg){:target="_blank"} |
`brilliant_msg` enables the host and Haloside halves of an application to **communicate using richly typed messages** — for example transmitting sprites to Halo with width, height, palette data, and pixel data as a single object.
`brilliant_msg` uses a programming model in which **a main event loop runs on Halo**. Messages are exchanged asynchronously and handled in an event-driven way, making it practical to build applications that simultaneously stream audio from Halo to the host *and* send display content back to Halo.
### How it works
{: .no_toc }
Large objects are serialized into multiple Bluetooth packets marked with a `msgCode`, and **efficiently reassembled on the device**. After parsing, the complete object is delivered to the Lua main loop.
* **`Tx` message types** — packing (Dart) + parsing (Lua) — e.g. `TxSprite.pack()` + `sprite.lua`
* **`Rx` message types** — parsing (Dart) + implicit serialization in Lua — e.g. `RxPhoto` + `camera.lua`
**Key changes for Halo in `brilliant_msg` 3.0.0:**
- `RxClick` + `ClickType` enum — Halo button click events (`single`, `double`, `long`), msg code `0x0B`
- `TxTextPage` with `CircularTextLayout` — text rendered within Halo's circular 256×256 display
- `data.lua` — queue-based message ordering with ACK byte flow control
- `imu.lua` — 6 × `float32` values with Halo-specific axis scaling and mapping
- `sprite.lua` / `image_sprite_block.lua` — Halo uses integer palette indices (0–15)
- `TxSprite` wire format — `compressed` flag byte added at header offset 5
### Startup sequence
{: .no_toc }
`brilliant_msg` applications follow a standard sequence:
1. Send break/reset/break signals to ensure Halo is in Lua REPL mode
2. Upload standard Lua libraries (`data`, `sprite`, `plain_text`, etc.)
3. Upload the main Lua application file
4. Start the Haloside event loop
5. Exchange messages asynchronously
### Example usage
{: .no_toc }
`sprite_display.dart`
```dart
import 'package:brilliant_ble/brilliant_ble.dart';
import 'package:brilliant_msg/brilliant_msg.dart';
// connect using brilliant_ble...
// BrilliantDevice frame = await BrilliantBluetooth.connect(scannedDevice);
Future run(BrilliantDevice frame) async {
// Pick an image file
FilePickerResult? result = await FilePicker.platform.pickFiles(
type: FileType.custom,
allowedExtensions: ['png'],
);
if (result != null) {
final pngBytes = await File(result.files.single.path!).readAsBytes();
final sprite = TxSprite.fromPngBytes(pngBytes: pngBytes);
await frame.sendMessage(0x20, sprite.pack());
}
}
```
`lua/halo_app.lua`
```lua
local data = require('data.min')
local sprite = require('sprite.min')
USER_SPRITE = 0x20
function app_loop()
frame.display.clear(0x000000)
print('Halo app is running')
while true do
rc, err = pcall(function()
local items = data.process_raw_items()
for _, item in ipairs(items) do
local msg_code, raw = item[1], item[2]
if msg_code == USER_SPRITE then
local spr = sprite.parse_sprite(raw)
sprite.set_palette(spr.num_colors, spr.palette_data)
frame.display.bitmap(1, 1, spr.width, 2^spr.bpp, 0, spr.pixel_data)
end
end
frame.sleep(0.001)
end)
if rc == false then
print(err)
frame.display.clear(0x000000)
break
end
end
end
app_loop()
```
| Selected Message Types | Description |
|------------------------|-------------|
| `TxSprite` | Send an indexed-color PNG image for display |
| `TxTextPage` | Send a page of text with `CircularTextLayout` for Halo's round display |
| `TxCaptureSettings` | Request a photo from the camera |
| `RxPhoto` | Receive a JPEG photo from the camera |
| `RxAudio` | Receive a PCM or LC3 audio stream |
| `RxIMU` | Receive accelerometer and magnetometer readings |
| `RxClick` | Receive Halo button click events (single / double / long) |
---
## `brilliant_sdk` meta-package
| [](https://pub.dev/packages/brilliant_sdk){:target="_blank"} | [Source](https://github.com/brilliantlabsAR/brilliant_sdk/tree/main/flutter/packages/brilliant_sdk){:target="_blank"} |
The `brilliant_sdk` meta-package bundles `brilliant_ble` and `brilliant_msg` as a single dependency for apps that use both packages. Add it to your `pubspec.yaml`:
```yaml
dependencies:
brilliant_sdk: ^1.0.0
```
---
## `simple_brilliant_app` scaffolding
| [](https://pub.dev/packages/simple_brilliant_app){:target="_blank"} | [Source](https://github.com/brilliantlabsAR/brilliant_sdk/tree/main/flutter/packages/simple_brilliant_app){:target="_blank"} |
`simple_brilliant_app` provides quickstart scaffolding for single-page Flutter applications that connect to Halo or Frame. It handles Bluetooth connection lifecycle, uploading Lua libraries and app files to the device, and provides mixins for common application patterns.
`simple_brilliant_app` 8.0.0 adds full Halo support:
- Device-aware startup: uses `frame.display.clear()` on Halo, bitmap fill on Frame
- `FrameVisionAppState` mixin: uses `RxClick` for Halo button input and `RxTap` for Frame tap input
### Getting started with `simple_brilliant_app`
{: .no_toc }
```bash
flutter pub add simple_brilliant_app
```
Follow the [flutter_blue_plus setup instructions](https://pub.dev/packages/flutter_blue_plus#getting-started){:target="_blank"} to configure your Android and iOS projects for Bluetooth LE.
Copy the template files from the package into your project:
- `template/main.dart` → `lib/main.dart`
- `template/frame_app.lua` → `assets/frame_app.lua`
Declare the Lua library assets in `pubspec.yaml`:
```yaml
flutter:
assets:
- packages/brilliant_msg/lua/data.min.lua
- packages/brilliant_msg/lua/sprite.min.lua
- packages/brilliant_msg/lua/plain_text.min.lua
- packages/brilliant_msg/lua/camera.min.lua
- packages/brilliant_msg/lua/audio.min.lua
- packages/brilliant_msg/lua/imu.min.lua
- assets/frame_app.lua
```
### `FrameVisionAppState` mixin — for camera and click/tap input
{: .no_toc }
The `FrameVisionAppState` mixin handles the differences between Halo and Frame input:
```dart
class _MyAppState extends State
with SimpleFrameAppState, FrameVisionAppState {
// Called when Halo button is clicked
@override
Future onClick(ClickType type) async {
if (type == ClickType.single) {
await capturePhoto();
}
}
// Called when Frame is tapped (tap count provided)
@override
Future onTap(int taps) async {
await capturePhoto();
}
}
```
---
## Installing from source
When working from the `brilliant_sdk` repository:
```bash
git clone https://github.com/brilliantlabsAR/brilliant_sdk.git
cd brilliant_sdk/flutter
# Install Melos
dart pub global activate melos
export PATH="$PATH":"$HOME/.pub-cache/bin"
# Bootstrap all packages
melos bootstrap
```
Common workspace commands:
| Command | Description |
|---------|-------------|
| `melos bootstrap` | Get dependencies for all packages |
| `melos analyze` | Run `flutter analyze` across all packages |
| `melos format` | Format all Dart files |
| `melos test` | Run tests across all packages |
========================================================================
PAGE: Web Bluetooth (https://docs.brilliant.xyz/halo/halo-sdk-webbluetooth/)
DESCRIPTION: An overview of the Brilliant SDK for building browser-based TypeScript/JavaScript apps that talk to Brilliant Halo.
========================================================================
# Brilliant SDK for Web Bluetooth
{: .no_toc }
---
The Brilliant SDK for Web Bluetooth is a TypeScript/JavaScript SDK for building browser-based applications that connect to Halo (or Frame). It is available in two npm packages:
- **[brilliant-ble](https://www.npmjs.com/package/brilliant-ble)** — low-level [Web Bluetooth API](https://developer.mozilla.org/en-US/docs/Web/API/Web_Bluetooth_API) interface
- **[brilliant-msg](https://www.npmjs.com/package/brilliant-msg)** — application-level message types (sprites, text, audio, IMU, photos, clicks)
{: .warning }
Web Bluetooth is only available in Chromium-based browsers (Chrome, Edge, Opera) on desktop and Android. It is **not** available in Firefox or Safari.
---
1. TOC
{:toc}
---
## `brilliant-ble` package: low-level connectivity
| [npm](https://www.npmjs.com/package/brilliant-ble){:target="_blank"} | [API Reference](https://brilliantlabsar.github.io/brilliant_sdk/brilliant-ble/api/){:target="_blank"} | [Source](https://github.com/brilliantlabsAR/brilliant_sdk/tree/main/webbluetooth/packages/brilliant-ble){:target="_blank"} |
The `BrilliantBle` class connects to Halo (or Frame) via the browser's Web Bluetooth API. Device type is detected automatically at connection time.
**Halo-specific features in `brilliant-ble` 0.4.0:**
- `BrilliantBle.type` getter — `BrilliantDeviceType` enum (`FRAME`, `HALO`, or `UNKNOWN`)
- `sendAudio(data, awaitBtResponse?)` — writes to the Halo audio characteristic
- `sendRemoveSignal()` — sends `0x05` to remove `main.lua` from Halo
- `sendData()` / `sendMessage()` — new `awaitBtResponse` option for write-with/without-response
### Installation
{: .no_toc }
```bash
npm install brilliant-ble
```
Or import from a CDN in your HTML:
```html
```
### Example usage
{: .no_toc }
```typescript
import { BrilliantBle, BrilliantDeviceType } from 'brilliant-ble';
const frame = new BrilliantBle();
// Connect — opens the browser's device picker
await frame.connect();
console.log('Connected to:', frame.type); // BrilliantDeviceType.HALO
// Send a Lua command
await frame.sendLua(
"frame.display.text('Hello, Halo!', 50, 100, 0xFFFFFF); print('done')",
{ awaitPrint: true }
);
await frame.disconnect();
```
---
## `brilliant-msg` package: application-level messaging
| [npm](https://www.npmjs.com/package/brilliant-msg){:target="_blank"} | [API Reference](https://brilliantlabsar.github.io/brilliant_sdk/brilliant-msg/api/){:target="_blank"} | [Source](https://github.com/brilliantlabsAR/brilliant_sdk/tree/main/webbluetooth/packages/brilliant-msg){:target="_blank"} |
`brilliant-msg` enables the host and Haloside halves of an application to **communicate using richly typed messages**.
`brilliant-msg` uses the same programming model as the Python and Flutter SDKs: a **main event loop runs on Halo**, and messages are exchanged asynchronously. Large objects are fragmented into multiple Bluetooth packets and efficiently reassembled on the device.
**Halo-specific features in `brilliant-msg` 1.1.0:**
- `RxClick` + `ClickType` enum — Halo button click events (`SINGLE`, `DOUBLE`, `LONG`), msg code `0x0B`
- `TxTextPage` with `CircularTextLayout` — text rendered within Halo's circular 256×256 display
- Updated Lua libraries (synced with Python and Flutter SDKs):
- `data.lua` — queue-based message ordering with ACK byte flow control
- `imu.lua` — 6 × `float32` values with device-specific axis scaling
- `sprite.lua` — Halo uses integer palette indices; Frame uses colour name strings
- `audio.lua` — reserves 1 byte for the leading flag byte
- `RxIMU` — decodes 6 `float32` values (was `int16`)
- `TxTextSpriteBlock` — updated `lineHeight` header format
### Installation
{: .no_toc }
```bash
npm install brilliant-ble brilliant-msg
```
### Example usage
{: .no_toc }
```typescript
import { BrilliantBle } from 'brilliant-ble';
import { BrilliantMsg, TxSprite, RxClick, ClickType } from 'brilliant-msg';
const ble = new BrilliantBle();
const frame = new BrilliantMsg(ble);
await ble.connect();
// Upload Lua libraries and main app
await frame.uploadStdluaLibs(['data', 'sprite']);
await frame.uploadFrameApp('./lua/halo_app.lua');
await frame.startFrameApp();
// Listen for button clicks from Halo
const rxClick = new RxClick({
callback: (type: ClickType) => {
console.log('Button:', type); // ClickType.SINGLE, .DOUBLE, or .LONG
if (type === ClickType.SINGLE) {
capturePhoto();
}
}
});
frame.attach(rxClick);
// Send a sprite to Halo
const imageBytes = await fetch('images/logo.png').then(r => r.arrayBuffer());
const sprite = await TxSprite.fromPngBytes(new Uint8Array(imageBytes));
await frame.sendMessage(0x20, sprite.pack());
```
`lua/halo_app.lua`
```lua
local data = require('data.min')
local sprite = require('sprite.min')
USER_SPRITE = 0x20
CLICK_MSG = 0x0B
function app_loop()
frame.display.clear(0x000000)
print('Halo app is running')
while true do
rc, err = pcall(function()
local items = data.process_raw_items()
for _, item in ipairs(items) do
local msg_code, raw = item[1], item[2]
if msg_code == USER_SPRITE then
local spr = sprite.parse_sprite(raw)
sprite.set_palette(spr.num_colors, spr.palette_data)
frame.display.bitmap(1, 1, spr.width, 2^spr.bpp, 0, spr.pixel_data)
end
end
frame.sleep(0.001)
end)
if rc == false then
print(err)
frame.display.clear(0x000000)
break
end
end
end
-- Send click events back to host
frame.button.single(function()
frame.bluetooth.send('\x0b\x01') -- msg code 0x0B, ClickType SINGLE
end)
frame.button.double(function()
frame.bluetooth.send('\x0b\x02') -- msg code 0x0B, ClickType DOUBLE
end)
frame.button.long(function()
frame.bluetooth.send('\x0b\x03') -- msg code 0x0B, ClickType LONG
end)
app_loop()
```
### Circular text layout for Halo's round display
{: .no_toc }
Use `CircularTextLayout` to constrain multi-line text within Halo's circular 256×256 display:
```typescript
import { TxTextPage, CircularTextLayout } from 'brilliant-msg';
const layout = new CircularTextLayout({
diameter: 256,
fontSizePx: 24,
lineSpacingPx: 4,
});
const page = new TxTextPage({
text: 'The quick brown fox jumps over the lazy dog',
layout,
});
// Send first page of text
const pages = page.getPages();
await frame.sendMessage(0x12, pages[0].pack());
```
---
## Building from source
```bash
git clone https://github.com/brilliantlabsAR/brilliant_sdk.git
cd brilliant_sdk/webbluetooth
# Install and build brilliant-ble first (brilliant-msg depends on it)
cd packages/brilliant-ble
npm install
npm run build
# Then build brilliant-msg
cd ../brilliant-msg
npm install
npm run build
```
Common commands (run from inside each package directory):
| Command | Description |
|---------|-------------|
| `npm run build` | Build the library to `dist/` |
| `npm run dev` | Start Vite dev server for the example app |
| `npm run docs:api` | Generate TypeDoc API documentation |
========================================================================
PAGE: Lua API Reference (https://docs.brilliant.xyz/halo/halo-sdk-lua/)
DESCRIPTION: A reference of Lua functionality available on your Brilliant Halo.
========================================================================
# Lua API
{: .no_toc }
---
Lua is a tiny and extensible scripting language that's designed to be power efficient and quick to learn. Halo features a Lua virtual machine based on Lua 5.4, with dedicated hardware APIs that allow direct access to all of Halo's peripherals.
{: .note }
The Lua virtual machine on Halo has a subset of the standard library. Lua's standard `io` and `os` libraries are not present. The global `require()` function loads modules from the device filesystem with standard Lua semantics: `require("myapp")` runs `/myapp.lua`, caches the result in `package.loaded`, and returns the module's return value.\
\
On power-on and after a restart, if `/main.lua` is present, it is automatically `require`d (executed).
There's no special cables or setup needed. Lua on Halo is accessed solely over Bluetooth, such that any user-created host app can easily execute scripts by pushing Lua strings to the device. To learn more about how the underlying Bluetooth communication with Halo works, check out the [Talking to Halo Over Bluetooth](/halo/halo-sdk-bluetooth-specs) page.
### Key differences from Frame
| Feature | Frame | Halo |
|---------|-------|------|
| Display size | 640×400 | 256×256 (round) |
| Display buffering | Double-buffered (`show()` required) | Writes directly — no `show()` needed |
| Display color format | Named palette colors | `0xRRGGBB` hex values |
| Input | IMU tap | Button (single / double / long) and IMU tap (single / double / triple) |
| Audio output | — | Speaker (PCM and LC3) plus on-device sound effects (`frame.sound`) |
| Microphone encoding | PCM only | PCM and LC3 |
| iOS notifications | — | ANCS client (`frame.ancs`) |
| Camera image processing | Fixed JPEG output | Configurable [libmpix](https://libmpix.org/) pipeline (`frame.camera.mpix`) |
| Sleep modes | `sleep()` deep sleep | `sleep()`, `standby()`, `light_sleep()`, `ship_mode()` |
| Firmware update | `frame.update()` → Nordic DFU | MCUboot/SMP over BLE |
---
1. TOC
{:toc}
---
## System
System-level APIs, including power management, battery, and device info.
| API | Description |
|:----|:------------|
| `frame.HARDWARE_VERSION` | Hardware version string (constant). Returns `"halo"` |
| `frame.FIRMWARE_VERSION` | Firmware version string (constant) |
| `frame.GIT_TAG` | Build source git commit hash, 12 hex characters (constant). Empty on firmware builds before 0.8.9 |
| `frame.SE_REVISION` | Secure Enclave firmware revision (constant) |
| `frame.get_se_revision()` | Secure Enclave firmware revision (lazy-loaded) |
| `frame.battery_level()` | Battery level as a percentage (0–100) |
| `frame.battery_voltage()` | Battery voltage in millivolts |
| `frame.battery_charging()` | `true` if battery is currently charging |
| `frame.sleep([seconds])` | Deep sleep. Disconnects BLE; wakes as a reboot |
| `frame.standby([seconds])` | Standby sleep. Keeps BLE; resumes where it left off |
| `frame.light_sleep([seconds])` | Light sleep. Keeps BLE; wakes with a Lua VM restart |
| `frame.ship_mode()` | Ultra-low power shutdown for long-term storage |
| `frame.stay_awake([enable])` | Prevent or allow sleep. Returns current state if no argument |
| `frame.charge([enable])` | Enable or disable battery charging |
| `frame.wakeup_source()` | Wakeup source string (see below) |
| `frame.yield()` | Yield execution to allow other tasks to run |
| `frame.reboot()` | Reboot the system immediately |
| `frame.get_eui()` | Device EUI-64 address as a 16-character hex string |
`frame.wakeup_source()` returns one of: `"unknown"`, `"timeout"`, `"button"`, `"ble"`, `"imu"`, or `"microphone"`.
**Sleep modes comparison:**
| Mode | BLE kept | Resumes | Use case |
|------|----------|---------|----------|
| `sleep()` | No | Reboots | Deep power saving |
| `standby()` | Yes | From where it paused | Stay connected, save power |
| `light_sleep()` | Yes | `main.lua` runs from the top | Quick naps, BLE stays alive |
| `ship_mode()` | No | Hardware reset only | Long-term storage / shipping |
After a `light_sleep()` wake nothing after the call executes — the Lua VM restarts and `main.lua` runs from the top. Read `frame.wakeup_source()` at the top of your script to learn why it is running. `standby()` is the mode that resumes in place.
```lua
-- Print device info
print(frame.HARDWARE_VERSION) -- halo
print(frame.FIRMWARE_VERSION) -- e.g. 0.8.9
print(frame.battery_level()) -- e.g. 87
-- Standby for 10 seconds (resumes after)
frame.standby(10)
print("Woke from: " .. frame.wakeup_source())
-- Get device identity
print(frame.get_eui()) -- e.g. "1234567890ABCDEF"
```
---
## Time
Time and date APIs for real-time clock and timezone management.
| API | Description |
|:----|:------------|
| `frame.time.utc([timestamp])` | Get or set UTC time as a Unix timestamp (seconds) |
| `frame.time.zone([offset])` | Get or set timezone offset string, e.g. `"+08:00"` |
| `frame.time.date([timestamp])` | Get local date/time as a table |
The table returned by `frame.time.date()` contains: `second`, `minute`, `hour`, `day`, `month`, `year`, `weekday` (0=Sunday), `day of year`, and `is daylight saving`.
If UTC was never set, `utc()` returns device uptime in seconds from boot.
`zone()` called with an argument stores the offset and returns it in normalised `±hh:mm` form. Offset rules: hours −12 to +14; minutes must be `00`, `30`, or `45`; UTC−12 and UTC+14 must have `00` minutes.
```lua
-- Set current time to 2025-01-01 00:00:00 UTC
frame.time.utc(1735689600)
frame.time.zone("+10:00")
local t = frame.time.date()
print(string.format("%04d-%02d-%02d %02d:%02d:%02d",
t.year, t.month, t.day, t.hour, t.minute, t.second))
```
---
## File System
File system APIs for reading and writing files on the device's LittleFS storage which presents a `/` mount point to the Lua environment.
| API | Description |
|:----|:------------|
| `frame.file.open(filename, [mode])` | Open a file. Mode: `"r"` (read), `"w"` (write/truncate), `"a"` (append). Default: `"r"` |
| `frame.file.remove(filename)` | Delete a file or empty directory |
| `frame.file.rename(old, new)` | Rename a file or directory |
| `frame.file.listdir(path)` | List directory contents. Returns table with `name`, `size`, `type` (1=file, 2=dir) |
| `frame.file.mkdir(path)` | Create a directory (supports nested creation) |
| `frame.file.remove_all()` | Remove all files and folders. Settings file is preserved |
| `f:read()` | Read a line from file. Returns `nil` at EOF |
| `f:write(data)` | Write string data to file |
| `f:close()` | Close file (important to call after writing) |
Use `require("modulename")` to load a Lua module from `/modulename.lua`. It behaves like standard Lua `require`: the module is executed once, its return value is cached in `package.loaded`, and subsequent calls return the cached value.
```lua
-- Write a file
local f = frame.file.open("log.txt", "w")
f:write("Hello from Halo\n")
f:close()
-- Read it back
local f = frame.file.open("log.txt", "r")
while true do
local line = f:read()
if line == nil then break end
print(line)
end
f:close()
-- List the root directory
local items = frame.file.listdir("")
for _, item in ipairs(items) do
local type_str = item.type == 1 and "file" or "dir"
print(item.name, item.size, type_str)
end
-- Load a module
local mymod = require("mymodule")
```
---
## Button
Button event callbacks for single click, double click, and long press.
| API | Description |
|:----|:------------|
| `frame.button.single(func)` | Set (or clear with `nil`) single-click callback |
| `frame.button.double(func)` | Set (or clear with `nil`) double-click callback |
| `frame.button.long(func)` | Set (or clear with `nil`) long-press callback |
The long-press callback fires when the button is held for 1 second and released before the 2-second power-off threshold.
{: .note }
Longer holds are reserved for system behaviors: at **2 s** a short beep marks the power-off threshold — releasing then powers Halo down into deep sleep. Holding through the beep to **5 s** opens the Bluetooth pairing window, marked by a coin chime. Holding to **15 s** enters ship mode (factory reset and full shutdown).
```lua
frame.button.single(function()
print("Single click!")
end)
frame.button.double(function()
print("Double click!")
end)
frame.button.long(function()
print("Long press!")
end)
-- Clear a callback
frame.button.single(nil)
```
---
## Bluetooth
APIs for sending and receiving raw byte data over Bluetooth. For a full description of how this works, see [Talking to Halo Over Bluetooth](/halo/halo-sdk-bluetooth-specs).
Halo bonds with up to 5 hosts. Pairing an additional host is done through the pairing window, opened with a 5-second button hold (see [Button](#button)).
| API | Description |
|:----|:------------|
| `frame.bluetooth.is_connected()` | Returns `true` if currently connected |
| `frame.bluetooth.address()` | MAC address as `"XX:XX:XX:XX:XX:XX"` |
| `frame.bluetooth.max_length()` | Maximum data length for a single `send()` (MTU minus 1 byte) |
| `frame.bluetooth.send(data)` | Send a string over Bluetooth. Length must be ≤ `max_length()` |
| `frame.bluetooth.receive_callback(func)` | Set (or clear with `nil`) receive callback `function(data)` |
Sending an empty string transmits nothing and still returns success — an end-of-stream marker must be a non-empty payload (e.g. a single byte).
```lua
frame.bluetooth.receive_callback(function(data)
-- echo data back to host
frame.bluetooth.send(data)
end)
print("MTU:", frame.bluetooth.max_length())
print("MAC:", frame.bluetooth.address())
```
---
## iOS Notifications (ANCS)
When the connected host is an iOS device, the Apple Notification Center Service (ANCS) client gives Lua access to the phone's notifications — incoming calls, messages, mail, and more.
ANCS requires an encrypted (bonded) link. The firmware discovers the service automatically on connection and completes the subscription as soon as encryption is established. On non-iOS hosts (e.g. Android) the service is reported as unavailable. All results and events are delivered asynchronously through callbacks, following the same model as `frame.bluetooth.receive_callback`.
| API | Description |
|:----|:------------|
| `frame.ancs.notification_callback(func)` | Set (or clear with `nil`) the notification event callback. Registering subscribes; clearing unsubscribes |
| `frame.ancs.attributes_callback(func)` | Set (or clear with `nil`) the callback receiving `get_notification_attributes()` results |
| `frame.ancs.app_attributes_callback(func)` | Set (or clear with `nil`) the callback receiving `get_app_attributes()` results |
| `frame.ancs.action_callback(func)` | Set (or clear with `nil`) the callback receiving `perform_action()` results |
| `frame.ancs.availability_callback(func)` | Set (or clear with `nil`) the callback invoked when ANCS becomes available or unavailable |
| `frame.ancs.is_available()` | `true` if an iOS device with ANCS is connected |
| `frame.ancs.is_subscribed()` | `true` if notification events are currently subscribed |
| `frame.ancs.get_notification_attributes(uid, [options])` | Request notification details (async). Returns `true`, or `false, reason` |
| `frame.ancs.get_app_attributes(app_id)` | Request an app's display name (async). Returns `true`, or `false, reason` |
| `frame.ancs.perform_action(uid, action)` | Perform a notification's `"positive"` or `"negative"` action (async). Returns `true`, or `false, reason` |
**Notification events.** Registering a function with `notification_callback` subscribes to ANCS notifications; iOS then immediately replays every notification currently in Notification Center with `pre_existing = true`, followed by live events. If registered while no iOS device is connected (or before pairing completes), the subscription is established automatically once possible. The callback receives an event table with:
| Field | Description |
|:------|:------------|
| `event` | `"added"`, `"modified"`, or `"removed"` |
| `uid` | Notification UID — the key for the other APIs. UIDs are only valid while connected and can be reused after `"removed"` |
| `category` | `"other"`, `"incoming_call"`, `"missed_call"`, `"voicemail"`, `"social"`, `"schedule"`, `"email"`, `"news"`, `"health_and_fitness"`, `"business_and_finance"`, `"location"`, `"entertainment"`, or `"unknown"` |
| `category_id` | Raw ANCS CategoryID number |
| `category_count` | Number of active notifications in this category |
| `silent`, `important`, `pre_existing`, `positive_action`, `negative_action` | Boolean ANCS event flags. `positive_action` / `negative_action` indicate `perform_action()` is possible |
| `dropped` | Only present if earlier events were lost to queue overflow (the count of lost events) |
**Notification attributes.** `get_notification_attributes(uid, [options])` requests details asynchronously; the result is delivered to the `attributes_callback`. Only one ANCS request (of any type) may be in flight at a time — the functions return `false, "busy"` while one is pending, `false, "unavailable"` if there is no ANCS, or `false, "error"`.
The `options` table selects which attributes to fetch. `title`, `subtitle`, and `message` accept a number (maximum bytes) or `true` for the default limit (64, 64, and 256 bytes respectively); `app_identifier`, `message_size`, `date`, `positive_action_label`, and `negative_action_label` are selected with `true`. Without `options`, the default set is `app_identifier`, `title` (64), `message` (256), and `date`. Passing an `options` table that selects no attributes raises an error.
The result table contains `uid` plus one field per requested attribute (absent if the phone reports it unavailable): `app_identifier` (bundle id, e.g. `"com.apple.MobileSMS"`), `title` / `subtitle` / `message` (UTF-8 strings, truncated by iOS to the requested maximums), `message_size` (full message size in bytes), `date` (`yyyyMMdd'T'HHmmSS`, e.g. `"20260707T093015"`), and `positive_action_label` / `negative_action_label`. On failure it instead carries an `error` string: `"invalid_parameter"` (the notification no longer exists), `"timeout"`, `"disconnected"`, `"too_large"`, `"not_encrypted"`, `"unknown_command"`, `"invalid_command"`, `"action_failed"`, or `"error"`.
**App attributes.** `get_app_attributes(app_id)` resolves a bundle identifier to a human-readable `display_name`; the result table carries `app_identifier`, `display_name` (absent if unknown), and the same `error` values on failure (`"invalid_parameter"` means the app is not installed). It can also return `false, "invalid_app_identifier"` immediately.
**Actions.** `perform_action(uid, action)` performs a notification's positive or negative action (e.g. answer/decline an incoming call, dismiss an alert). It is only valid for notifications whose event carried `positive_action` / `negative_action = true`; the action labels can be fetched via `get_notification_attributes`. `action` must be `"positive"` or `"negative"` (anything else raises an error). The `action_callback` is optional — actions still execute without it, but failures such as `"action_failed"` are then only logged.
**Availability.** iOS may publish ANCS only after the device is unlocked, so availability can change at any time during a connection; `availability_callback` receives a boolean on each change.
```lua
frame.ancs.attributes_callback(function(result)
if result.error then
print("attribute fetch failed: " .. result.error)
else
print((result.title or "?") .. ": " .. (result.message or ""))
end
end)
frame.ancs.notification_callback(function(event)
if event.event == "added" and not event.pre_existing then
print("New " .. event.category .. " notification, uid " .. event.uid)
frame.ancs.get_notification_attributes(event.uid)
end
end)
-- Dismiss a notification
frame.ancs.perform_action(uid, "negative")
-- Stop receiving notifications
frame.ancs.notification_callback(nil)
```
---
## IMU
IMU (Inertial Measurement Unit) APIs for orientation, raw sensor data, and tap detection.
| API | Description |
|:----|:------------|
| `frame.imu.tap_callback(func)` | Set (or clear with `nil`) tap detection callback. Called as `func(kind)` with `'single'`, `'double'`, or `'triple'` |
| `frame.imu.tap_config([options])` | Tune the tap detector, or read the current configuration when called with no argument |
| `frame.imu.direction()` | Returns `{pitch, roll, heading}` angles in degrees |
| `frame.imu.raw()` | Returns `{compass={x,y,z}, accelerometer={x,y,z}}` raw data |
| `frame.imu.config(options)` | Configure sampling frequency and full scale range |
### Tap detection
The tap callback fires on hardware-detected **single, double, and triple** taps and receives the gesture kind as its argument (handlers that take no argument keep working — Lua ignores extra arguments). The detector confirms a gesture only after the multi-tap window expires, so a single tap that turns out to be the first tap of a double does not fire `'single'` first — each physical gesture produces exactly one callback. The trade-off is that a single tap is reported roughly one gesture window after the tap. Registering a callback raises an error if the hardware tap trigger cannot be armed.
`tap_config()` tunes the detector. Settings apply immediately (the detector re-arms) and reset to the defaults on reboot. The defaults are tuned for a worn device: reliable temple taps, ordinary table set-downs rejected (a very firm set-down can still register — it is physically a tap). Multi-tap gestures want deliberate, crisp taps; an app that only listens for e.g. `'double'` may relax `threshold` for easier gestures at the cost of more spurious singles.
Each field of the `options` table is optional; unlisted fields keep their value:
| Field | Description |
|:------|:------------|
| `mode` | `'sensitive'`, `'normal'`, or `'robust'` — detection strictness (default `'normal'`) |
| `axis` | `'x'`, `'y'`, or `'z'` — the **single** dominant axis the detector watches (hardware limitation; default `'z'`, the worn temple-tap axis — device gravity sits on X when worn) |
| `threshold` | Minimum tap peak, 0–1023 raw units (default `200`; lower = lighter taps register) |
| `gesture_duration` | Window after the first tap for the 2nd/3rd, 0–63 (default `30`) |
| `wait_for_timeout` | Confirm gestures only after the window expires (default `true`). Disabling reports singles immediately, but a double then also fires `'single'` |
| `max_peaks` | Threshold crossings tolerated around one tap, 0–7 (default `6`) |
| `peak_duration` | 0–15 (default `4`) — raw-unit shock timing; see the BMA580 datasheet |
| `shock_duration` | 0–15 (default `6`) |
| `quiet_between_taps` | 0–15 (default `8`) |
| `quiet_after_gesture` | 0–15 (default `6`) |
`tap_config()` with no argument returns the full configuration table; unknown `mode`/`axis` values or out-of-range numbers raise an error.
### Orientation and raw data
`imu.direction()` returns `pitch` (rotation around X) and `roll` (rotation around Y) in degrees. `heading` is always `0.0` — kept for Frame API compatibility. A meaningful compass heading needs host-side calibration (per-unit hard-iron tumble, mag/accel alignment, local declination); compute it on the host from `frame.imu.raw()`.
`imu.raw()` returns compass data in µT (micro-Tesla) and accelerometer data in mg (milli-g).
`imu.config(options)` accepts a table with optional `accelerometer` and `magnetometer` sub-tables, each with optional `sampling_frequency` (Hz) and `full_scale` (g or Gauss) fields.
```lua
-- Orientation
local o = frame.imu.direction()
print("Pitch:", o.pitch, "Roll:", o.roll)
-- Tap callback
frame.imu.tap_callback(function(kind)
if kind == 'double' then
print("Double tap!")
end
end)
-- Easier multi-taps
frame.imu.tap_config({ threshold = 150 })
print(frame.imu.tap_config().mode) -- 'normal'
-- Raw sensor data
local data = frame.imu.raw()
print("Accel X:", data.accelerometer.x, "mg")
-- Configure IMU
frame.imu.config({
accelerometer = { sampling_frequency = 200, full_scale = 16 },
magnetometer = { sampling_frequency = 100, full_scale = 4 }
})
```
---
## Compression
LZ4 decompression. Only decompression is supported (compression is done on the host).
| API | Description |
|:----|:------------|
| `frame.compression.process_function(func)` | Set (or clear with `nil`) callback for decompressed data blocks |
| `frame.compression.decompress(data, block_size)` | Decompress LZ4 data. `block_size` must be 1–1,048,576 |
`process_function` must be registered before calling `decompress`. The callback is invoked once per decompressed block.
```lua
frame.compression.process_function(function(data)
local f = frame.file.open("output.bin", "a")
f:write(data)
f:close()
end)
-- Decompress into 4KB blocks
frame.compression.decompress(compressed_data, 4096)
```
To compress data on the host for sending to Halo:
```sh
lz4 -9 -B4096 input.bin output.lz4
```
---
## Speaker
Audio playback from the host over Bluetooth. Supports PCM and LC3 encoded audio.
| API | Description |
|:----|:------------|
| `frame.speaker.start(cfg)` | Initialize the speaker with a configuration table |
| `frame.speaker.play(data)` | Play a binary audio string directly |
| `frame.speaker.volume([val])` | Get or set volume (0–100). Get works without initialization |
| `frame.speaker.stop()` | Stop playback and release resources |
**`frame.speaker.start(cfg)` configuration:**
| Field | Type | Default | Description |
|-------|------|---------|-------------|
| `encoder` | string | `"pcm"` | `"pcm"` or `"lc3"` |
| `sample_rate` | number | 8000 | 8000 or 16000 Hz |
| `channels` | number | 1 | 1 (mono) or 2 (stereo) |
| `bit_depth` | number | 16 | 16 bits (PCM only, 8-bit not supported) |
| `duration` | number | 1000 | LC3 frame duration in µs/10: `750` = 7.5 ms, `1000` = 10 ms |
| `bitrate` | number | 16000 | LC3 bitrate (multiple of 8000, ≤96000 bps) |
| `volume` | number | 50 | Volume (0–100%) |
| `gain` | number | 0 | Digital pre-gain in whole dB (0–12), applied before the protection limiter |
| `budget` | number | — | Speaker energy-budget override (10–100). Omit for the firmware default |
Calling `start()` while already running stops and restarts the speaker with the new configuration.
**Loudness (`gain` and `budget`).** Both settings apply to the one stream being started and reset when the speaker is next started — they are not persisted like `volume`. `gain` boosts the signal *into* the speaker protection chain: a quiet source (for example un-normalized text-to-speech) is lifted toward the loudness ceiling, while an already-hot source is compressed by the limiter instead of getting louder, so the best results come from normalizing audio on the host and using `gain` for the remainder. `budget` raises (or lowers) the ceiling itself — the energy budget the speaker protection enforces — at the cost of higher peak battery current; values above the firmware's configured maximum are clamped. All speaker protection stays active regardless of these settings.
{: .note }
While the display is active, the firmware automatically reduces the speaker energy budget and restores it when the display returns to power save — so audio plays loudest while the display is asleep. The transition is ramped smoothly, even mid-stream.
```lua
-- Start PCM speaker
frame.speaker.start({
encoder = "pcm",
sample_rate = 16000,
channels = 1,
volume = 80
})
-- Start LC3 speaker
frame.speaker.start({
encoder = "lc3",
sample_rate = 16000,
duration = 1000,
bitrate = 32000,
volume = 80
})
-- Loudest playback of a quiet TTS stream: pre-gain into the limiter
-- and a raised energy budget (display off gives the full budget)
frame.speaker.start({
encoder = "lc3",
sample_rate = 16000,
bitrate = 32000,
gain = 12,
budget = 100
})
-- Adjust volume
frame.speaker.volume(60)
-- Stop when done
frame.speaker.stop()
```
---
## Sound Effects
Procedurally generated sound effects (SFXR). Sounds are synthesised on the device from a named preset, so no audio assets need to be uploaded.
Available presets: `pickup`, `laser`, `explosion`, `powerup`, `hit`, `jump`, `blip`.
| API | Description |
|:----|:------------|
| `frame.sound.play(name, [options])` | Generate and play a preset. Blocks until playback finishes |
| `frame.sound.play_async(name, [options])` | Generate and play a preset without blocking |
| `frame.sound.stop()` | Stop the currently playing async sound |
| `frame.sound.is_playing()` | `true` while an async sound is playing |
The optional `options` table accepts:
| Field | Description |
|:------|:------------|
| `seed` | Makes the sound deterministic/repeatable. Omit for a new random variant on every call |
| `duration_ms` | Playback duration in ms (default `1000`) |
| `volume` | 0–100 (default `20`) |
| `sample_rate` | Output sample rate in Hz, `8000` or `16000` only (default `16000`) |
`play` and `play_async` return `true` on success; on failure they return `nil`, an error string, and an error code (e.g. unknown preset name, or the speaker is busy or unavailable).
```lua
-- A different laser every time
frame.sound.play("laser")
-- The same powerup every time, quieter and shorter
frame.sound.play("powerup", { seed = 84, duration_ms = 600, volume = 40 })
-- Play in the background
frame.sound.play_async("jump")
while frame.sound.is_playing() do
-- do other work while it plays
end
```
The sound engine is an implementation of [sfxr](https://www.drpetter.se/project_sfxr.html), the procedural sound-effect generator created by Tomas "DrPetter" Pettersson.
---
## Microphone
Audio recording from Halo's microphone. Supports both PCM and LC3 encoding, with optional Audio Activity Detection (AAD), on-device acoustic echo cancellation (AEC), and a voice-band mode.
| API | Description |
|:----|:------------|
| `frame.microphone.start(cfg)` | Initialize the microphone with a configuration table |
| `frame.microphone.read(bytes)` | Read up to `bytes` bytes from the ring buffer (must be positive, even, ≤4096) |
| `frame.microphone.gain([val])` | Get or set gain (−10 to 10). Get works without initialization |
| `frame.microphone.stop()` | Stop recording and release resources |
| `frame.microphone.status()` | Microphone state: `"stopped"`, `"streaming"`, or `"le_audio"` |
| `frame.microphone.aad_callback(func, [threshold], [silent_period])` | Set Audio Activity Detection callback |
| `frame.microphone.aec([enable])` | Get or set on-device echo cancellation |
| `frame.microphone.voice([enable])` | Get or set voice-band mode |
| `frame.microphone.diag(cmd)` | AEC diagnostics: `"stats"` returns a table of canceller internals, `"zero"` resets the counters |
**`frame.microphone.start(cfg)` configuration:**
| Field | Type | Default | Description |
|-------|------|---------|-------------|
| `encoder` | string | `"pcm"` | `"pcm"` or `"lc3"` |
| `sample_rate` | number | 8000 | 8000 or 16000 Hz |
| `bit_depth` | number | 16 | 8 or 16 (PCM only; LC3 requires 16). Capture and processing always run at 16-bit; 8 selects signed 8-bit *output*, downconverted after the processing stages — halving BLE bandwidth |
| `channels` | number | 1 | 1 (mono) or 2 (stereo) |
| `duration` | number | 1000 | LC3 frame duration in µs/10: `750` = 7.5 ms, `1000` = 10 ms |
| `bitrate` | number | 16000 | LC3 bitrate (multiple of 8000, ≤96000 bps) |
| `gain` | number | 0 | Gain (−10 to 10) |
| `aec` | boolean | false | Echo cancellation for this session (see below). Off = raw mic |
| `voice` | boolean | false | Voice-band mode (see below). Independent of `aec` |
**Reading.** `microphone.read()` is non-blocking and returns immediately:
- A string of up to `bytes` of audio data — if fewer bytes are buffered, the read is partial (PCM is even-byte aligned; LC3 is byte-accurate FIFO)
- An empty string if the microphone is running but nothing is buffered yet
- `nil` if not streaming (or after `stop()` once all data is consumed)
The DMIC driver captures audio in fixed-size blocks, so the first `read()` cannot return audio until the first block lands in the ring buffer — poll in your main loop while capture starts up. Standby and light sleep stop the mic and clear the buffer, so the same startup delay applies again after wake.
**LE Audio.** Halo also exposes its microphone and speakers as standard LE Audio endpoints. When the connected host establishes an LE Audio microphone stream, it takes priority over `frame.microphone`: an active capture is preempted (`read()` then raises `"Microphone taken over by LE Audio"` and the capture's resources are released), and `start()` fails while the host holds the stream. Use `status()` to detect this state and restart capture once it returns to `"stopped"`.
**Echo cancellation and voice-band mode.** `aec()` cancels speaker audio from the microphone stream on-device. It is off by default — the mic is raw capture until a session opts in via `start{aec=true}` or the setter — and can be toggled live while streaming (letting an app A/B the raw and cleaned feed). When the speaker is idle, an enabled AEC is a pass-through with no added latency; while the speaker plays it adds a one-block hold-back. `voice()` band-passes the mic output to a speech band (~300–3400 Hz); enabling it recomputes the filter for the current sample rate and resets its state. The two are independent stages on the mic path (`mic → [aec] → [voice] → encode`): pair them to confine the mic to the AEC's working band so out-of-band echo can't reach a server-side VAD; `voice` alone just band-limits the raw mic. Both are getter/setters mirroring `gain()`: call with no argument to read the current state, with a boolean to set.
**`frame.microphone.aad_callback(func, [threshold], [silent_period])`:**
`threshold` is in dB SPL (60–100; hardware supports 60, 65, 70, 75, 80, 85, 90, 95, 97.5 dB; default 90).
`silent_period` is in ms (0–10000; default 1000): time before next detection after triggering.
```lua
local mtu = frame.bluetooth.max_length()
-- Start PCM microphone at 16kHz
frame.microphone.start({
encoder = "pcm",
sample_rate = 16000,
channels = 1,
gain = 3
})
-- Stream audio to host
while true do
local data = frame.microphone.read(mtu)
if data == nil then break end
if data ~= "" then
frame.bluetooth.send(data)
end
frame.yield()
end
```
```lua
-- Speech-band, echo-cancelled capture (e.g. for a server VAD)
frame.microphone.start({ encoder = "lc3", sample_rate = 16000, aec = true, voice = true })
```
```lua
-- Use AAD to start recording only when sound is detected
frame.microphone.aad_callback(function()
print("Sound detected! Recording...")
frame.microphone.start({ encoder = "pcm", sample_rate = 16000 })
end, 75, 2000) -- 75 dB threshold, 2 second silent period
```
---
## Display
Display APIs for drawing text, bitmaps, and vector graphics on Halo's 256×256 circular screen.
{: .note }
Unlike Frame, Halo's display has no double-buffer. Draw calls take effect immediately — there is no `show()` call required (calling it has no effect).
All draw coordinates are in the range 1–256; values below 1 are clamped to 1.
| API | Description |
|:----|:------------|
| `frame.display.text(text, x, y, color)` | Draw text at `x, y`. `color` is `0xRRGGBB` (default `0xFFFFFF`) |
| `frame.display.char(codepoint, x, y, color)` | Draw a single Unicode character by codepoint |
| `frame.display.set_font(font_id, size, scale)` | Set the current font for text rendering |
| `frame.display.get_font_list()` | Returns the available fonts as a table keyed by font id: `{[0]="Dogica", [1]="DogicaBold"}` |
| `frame.display.bitmap(x, y, width, format, offset, data, [opts])` | Draw indexed or RGB bitmap |
| `frame.display.set_pixel(x, y, color)` | Set a single pixel |
| `frame.display.line(x0, y0, x1, y1, color)` | Draw a line |
| `frame.display.rect(x, y, w, h, color, filled)` | Draw a rectangle (filled or outline) |
| `frame.display.circle(cx, cy, r, color, filled)` | Draw a circle (filled or outline) |
| `frame.display.polygon(points, color)` | Draw a polygon from an array of `{x, y}` pairs |
| `frame.display.clear([color])` | Clear screen to `color` (default `0x000000`) |
| `frame.display.width()` | Display width in pixels (256) |
| `frame.display.height()` | Display height in pixels (256) |
| `frame.display.brightness([value])` | Get or set brightness as a percentage (0–100) |
| `frame.display.set_brightness(level)` | Set brightness to a predefined level (−2, −1, 0, 1, 2) |
| `frame.display.get_brightness()` | Get brightness as a predefined level (−2 to 2) |
| `frame.display.power_save(enable)` | `true` to enter display power save; `false` to leave it |
| `frame.display.show([enable])` | No-op — Halo renders directly without a buffer flip |
**Fonts:** `set_font(font_id, size, scale)` selects the font used by `text()` and `char()`. `font_id` is `0` (Dogica) or `1` (DogicaBold). `size` is the font size in pixels and must be a multiple of 8 — the fonts are 8px pixel fonts, scaled losslessly to 16, 24, 32, and so on. `scale` is an additional scale factor applied on top of `size`.
```lua
frame.display.set_font(1, 16, 1) -- DogicaBold at 16px
frame.display.text("Bold text", 50, 50)
```
**Color palette commands:**
| API | Description |
|:----|:------------|
| `frame.display.assign_color(index, r, g, b)` | Set palette entry by index (0–15 or color name) using RGB888 |
| `frame.display.assign_color_ycbcr(index, y, cb, cr)` | Set palette entry using native YCbCr (4+3+3 bits) |
**Bitmap (`frame.display.bitmap`) parameters:**
| Parameter | Description |
|-----------|-------------|
| `x, y` | Top-left position (1–256) |
| `width` | Bitmap width in pixels |
| `color_format` | Number of colours in the data: `0` = RGB888 direct, `2` = 1 bit/px, `4` = 2 bits/px, `16` = 4 bits/px |
| `palette_offset` | Added to each non-zero pixel index to select the palette entry (0–15). The shift never wraps: an index pushed past entry 15 is skipped entirely. Source index 0 is always transparent, regardless of offset |
| `data` | Pixel data string (binary) |
| `options` | Optional table: `x_scale`, `y_scale` (scale factors, default 1), `palette_data` (custom 3-bytes-per-color RGB string) |
**Color palette names:** `VOID`, `WHITE`, `GREY`, `RED`, `PINK`, `DARKBROWN`, `BROWN`, `ORANGE`, `YELLOW`, `DARKGREEN`, `GREEN`, `LIGHTGREEN`, `NIGHTBLUE`, `SEABLUE`, `SKYBLUE`, `CLOUDBLUE`
#0 VOID
#1 WHITE
#2 GREY
#3 RED
#4 PINK
#5 DARKBROWN
#6 BROWN
#7 ORANGE
#8 YELLOW
#9 DARKGREEN
#10 GREEN
#11 LIGHTGREEN
#12 NIGHTBLUE
#13 SEABLUE
#14 SKYBLUE
#15 CLOUDBLUE
**Display pan:**
| API | Description |
|:----|:------------|
| `frame.display.set_pan(x, y)` | Shift display content. Both values in range −50 to +50 |
| `frame.display.get_pan()` | Returns current `x, y` pan offset |
Pan settings are saved to non-volatile storage and restored after reboot or wakeup from sleep.
```lua
-- Draw some text
frame.display.text("Hello Halo", 50, 50)
-- Draw a filled blue circle (Halo only)
frame.display.circle(128, 128, 50, 0x0055FF, true)
-- Draw a white outline rectangle (Halo only)
frame.display.rect(20, 20, 80, 40, 0xFFFFFF, false)
-- Custom palette
frame.display.assign_color(1, 255, 128, 0) -- orange at index 1
-- Clear screen to black (Halo only)
frame.display.clear(0x000000) -- or just frame.display.clear()
-- Display a 2-colour (1 bit/px) indexed bitmap
local pixels = string.rep("\xFF", 32 / 8 * 32) -- 32×32 white block
frame.display.bitmap(100, 100, 32, 2, 0, pixels)
```
---
## Camera
Camera capture APIs. Halo's camera captures images in JPEG format. Only 640px resolution is supported. Camera images are read in Lua and sent to the host over the regular data channel using `frame.bluetooth.send()` (see [Bluetooth specs](/halo/halo-sdk-bluetooth-specs)).
| API | Description |
|:----|:------------|
| `frame.camera.capture(cfg)` | Start async image capture. `cfg` is a table (may be empty) with optional `resolution` (640) and `quality` |
| `frame.camera.image_ready()` | Returns `true` when the capture is complete and ready to read |
| `frame.camera.read(bytes)` | Read `bytes` of JPEG data. Returns `nil` when all data is consumed |
| `frame.camera.read_raw(bytes)` | Read raw sensor data (skips JPEG header) |
| `frame.camera.power_save(flag)` | `true` to sleep the camera; `false` to wake it |
Quality options: `"VERY_HIGH"`, `"HIGH"`, `"MEDIUM"`, `"LOW"`, `"VERY_LOW"`. The setting selects the encoder's quantization level; the encoder has four levels, so `"LOW"` and `"VERY_LOW"` produce the same output. A 640px capture encodes to roughly 80/47/25/16 KB from `"VERY_HIGH"` down to `"LOW"`.
If the camera is in power save mode, call `camera.power_save(false)` before capturing.
```lua
local mtu = frame.bluetooth.max_length()
-- Capture a photo
frame.camera.capture({ quality = "HIGH" })
-- Wait until ready
while not frame.camera.image_ready() do
frame.sleep(0.05)
end
-- Stream JPEG to host
while true do
local data = frame.camera.read(mtu)
if data == nil then break end
frame.bluetooth.send(data)
end
-- Put camera to sleep when not needed
frame.camera.power_save(true)
```
---
## Camera Image Processing (libmpix)
Halo integrates [libmpix](https://libmpix.org/), an image signal processing library that gives Lua scripts direct control over the camera pipeline. Instead of receiving a fixed JPEG, you can compose a pipeline of operations — debayering, colour correction, denoise, resize, format conversion — before the image is encoded.
{: .note }
`frame.camera.mpix` is a Halo-only API. It has no equivalent on Frame.
The firmware automatically computes per-frame statistics (luminance histogram, per-channel averages) and uses them for auto black-level and auto white-balance. These auto values are applied through the pipeline's `correct_black_level` and `correct_white_balance` operations. The default pipeline (used if you don't call `set_pipeline`) is:
```
debayer_2x2 → correct_black_level → correct_white_balance → jpeg_encode
```
### Pipeline operations
All pipeline operations take the pipeline table as their first argument and append themselves to it. Call `frame.camera.mpix.set_pipeline(pipeline)` to install the pipeline; it takes effect on the next `frame.camera.capture()` call.
| API | Parameters | Description |
|:----|:-----------|:------------|
| `frame.camera.mpix.op.debayer_2x2(p)` | — | 2×2 binned debayer (fastest; default) |
| `frame.camera.mpix.op.debayer_1x1(p)` | — | Full-resolution 1×1 debayer |
| `frame.camera.mpix.op.debayer_3x3(p)` | — | 3×3 high-quality debayer |
| `frame.camera.mpix.op.debayer_ir_5x3(p)` | — | 5×3 debayer for IR-cut sensor patterns |
| `frame.camera.mpix.op.correct_black_level(p)` | — | Subtract black level (set via `cid.BLACK_LEVEL` or auto) |
| `frame.camera.mpix.op.correct_white_balance(p)` | — | Apply red/blue channel balance (auto or manual) |
| `frame.camera.mpix.op.correct_gamma(p)` | — | Apply gamma correction (set via `cid.GAMMA_LEVEL`) |
| `frame.camera.mpix.op.correct_color_matrix(p)` | — | Apply 3×3 color correction matrix |
| `frame.camera.mpix.op.correct_fused(p)` | — | Fused black level + gamma + color matrix in one pass |
| `frame.camera.mpix.op.convert(p, fmt)` | `fmt` — pixel format constant from `mpix.fmt` | Convert to a different pixel format |
| `frame.camera.mpix.op.crop(p, x, y, w, h)` | Pixel offset and dimensions | Crop image to a sub-region |
| `frame.camera.mpix.op.resize_subsample(p, w, h)` | Target width and height | Downsample by integer subsampling |
| `frame.camera.mpix.op.kernel_convolve_3x3(p, type)` | `type` — kernel constant from `mpix.kernel` | Apply a 3×3 convolution kernel |
| `frame.camera.mpix.op.kernel_convolve_5x5(p, type)` | `type` — kernel constant from `mpix.kernel` | Apply a 5×5 convolution kernel |
| `frame.camera.mpix.op.kernel_denoise_3x3(p)` | — | 3×3 median denoise |
| `frame.camera.mpix.op.kernel_denoise_5x5(p)` | — | 5×5 median denoise |
| `frame.camera.mpix.op.jpeg_encode(p)` | — | Encode to JPEG (quality via `cid.JPEG_QUALITY`) |
| `frame.camera.mpix.op.qoi_encode(p)` | — | Encode to QOI lossless format |
| `frame.camera.mpix.op.palette_encode(p, fmt)` | `fmt` — palette format (`mpix.fmt.PALETTE1`…`PALETTE8`) | Quantise to a colour palette |
| `frame.camera.mpix.op.palette_decode(p)` | — | Expand a palette image back to RGB |
### Controls
Controls are integer values applied to the pipeline. Balance values use Q10 fixed-point (multiply the floating-point ratio by 1024).
| API | Description |
|:----|:------------|
| `frame.camera.mpix.set_ctrl(cid, value)` | Set a control value. `cid` is a constant from `frame.camera.mpix.cid` |
| Control (`frame.camera.mpix.cid.*`) | Description |
|:-------------------------------------|:------------|
| `BLACK_LEVEL` | Subtracted from every pixel before colour processing |
| `GAMMA_LEVEL` | Gamma curve level |
| `RED_BALANCE` | Red channel multiplier in Q10 (e.g. `1229` ≈ ×1.2) |
| `BLUE_BALANCE` | Blue channel multiplier in Q10 (e.g. `1843` ≈ ×1.8) |
| `JPEG_QUALITY` | JPEG quality (higher = better quality, larger file) |
| `COLOR_MATRIX_0` … `COLOR_MATRIX_8` | 3×3 color correction matrix entries in Q10 (row-major) |
### Statistics
`frame.camera.mpix.get_stats()` returns a table populated after the previous frame was processed. The firmware calls this internally for auto-tuning; you can also use it in your own Lua logic.
| Field | Description |
|:------|:------------|
| `y_histogram` | Array of luminance histogram bin counts |
| `y_histogram_vals` | Corresponding luminance values for each bin |
| `y_histogram_total` | Total pixel count across all bins |
| `rgb_average_r/g/b` | Per-channel average pixel value |
| `rgb_min_r/g/b` | Per-channel minimum pixel value |
| `rgb_max_r/g/b` | Per-channel maximum pixel value |
| `nvals` | Number of pixels sampled for statistics |
### Kernel and format constants
**`frame.camera.mpix.kernel`** — convolution kernel presets for `kernel_convolve_*` operations:
| Constant | Effect |
|:---------|:-------|
| `edge_detect` | Highlight edges |
| `gaussian_blur` | Smooth/blur |
| `identity` | No-op (pass-through) |
| `sharpen` | Enhance edges/detail |
**`frame.camera.mpix.fmt`** — pixel format constants for `convert` and `palette_encode`:
`RGB332`, `RGB565`, `RGB24`, `XRGB32`, `YUV24`, `YUYV`, `GREY`, `JPEG`, `QOI`, `PALETTE1`–`PALETTE8`, and raw Bayer formats (`SBGGR8`, `SGBRG8`, etc.).
### Example
```lua
local mtu = frame.bluetooth.max_length()
-- Build a custom pipeline: denoise, then encode as JPEG
local pipeline = {}
frame.camera.mpix.op.debayer_2x2(pipeline)
frame.camera.mpix.op.correct_black_level(pipeline)
frame.camera.mpix.op.correct_white_balance(pipeline)
frame.camera.mpix.op.kernel_denoise_3x3(pipeline)
frame.camera.mpix.op.jpeg_encode(pipeline)
frame.camera.mpix.set_pipeline(pipeline)
-- Wake the camera and capture
frame.camera.power_save(false)
frame.camera.capture({ quality = "HIGH" })
-- Wait until processing is complete
while not frame.camera.image_ready() do
frame.sleep(0.05)
end
-- Stream JPEG data to the host
while true do
local data = frame.camera.read(mtu)
if data == nil then break end
frame.bluetooth.send(data)
end
```
You can also customise controls manually — for example to override the auto white balance:
```lua
-- Manual white balance: Q10 fixed-point (value = ratio × 1024)
frame.camera.mpix.set_ctrl(frame.camera.mpix.cid.RED_BALANCE, math.floor(1.4 * 1024))
frame.camera.mpix.set_ctrl(frame.camera.mpix.cid.BLUE_BALANCE, math.floor(2.0 * 1024))
```
Or to use `get_stats()` from the previous frame to tune the next one:
```lua
local stats = frame.camera.mpix.get_stats()
print("Avg luminance R/G/B:", stats.rgb_average_r, stats.rgb_average_g, stats.rgb_average_b)
```
---
========================================================================
PAGE: Talking to Halo Over Bluetooth (https://docs.brilliant.xyz/halo/halo-sdk-bluetooth-specs/)
DESCRIPTION: A reference on how to manually communicate with Halo over Bluetooth Low Energy
========================================================================
# Talking to Halo Over Bluetooth
{: .no_toc }
---
You may want to communicate with Halo manually over Bluetooth Low Energy if we don't yet have an SDK available for your preferred development language, or if you want full control of what's going on under the hood.
Once you're communicating with Halo over Bluetooth, you can use the [Lua API Reference](/halo/halo-sdk-lua) to see everything you can tell it to do.
1. TOC
{:toc}
---
## Pairing & Connecting
Halo uses BLE bonding and must pair with a host device before any communication can take place. When attempting to connect to Halo using an SDK, Halo will automatically initiate pairing, which the OS handles and the user will have to agree to.
Halo stores up to **5 bonded devices**. Out of the box (or after a factory reset) it is always pairable. Once at least one device is bonded, unknown devices are refused — to pair an additional device, hold Halo's button for **5 seconds** (a chime plays and the LED starts flashing) to open a ~60-second **pairing window**; the next new device to connect is paired and bonded. If all 5 slots are in use, the least recently used bond is replaced.
**Device Naming:** Halo devices are named as `Halo XX`, where `XX` is the 4th byte (in hex) of the device's EUI-48 MAC address.
Full Bluetooth Connection Details
### Connection Behavior
- Halo accepts **one connection at a time**: connectable advertising stops while a device is connected and resumes on disconnect, so a second bonded device doesn't see Halo until the first releases it. A connection from a device Halo doesn't recognize is dropped without pairing unless the pairing window is open — if your connection appears to succeed and then immediately drops, this is why.
- While the pairing window is open, already-bonded devices are refused so the new device can get in; they reconnect normally once the window closes (on a successful pairing, after ~60 seconds, or on reboot). Opening the window disconnects any current connection.
- A host where you used "Forget This Device" can re-pair itself on its next connection — no button press needed.
- To make Halo forget all paired devices, factory reset it (15-second button hold, charger disconnected).
### Bluetooth Connection Diagram

## Bluetooth Services & Characteristics
Halo implements four BLE services:
### Halo Lua Service
**Service UUID:** `7A230001-5475-A6A4-654C-8431F6AD49C4`
Characteristic names are from the **host's** perspective — TX means the host transmits to Halo, RX means the host receives from Halo.
| Characteristic | UUID | Permissions | Description |
|----------------|------|-------------|-------------|
| LUA TX | `7A230002-5475-A6A4-654C-8431F6AD49C4` | Write Without Response, Write | Host sends Lua commands and data to Halo |
| LUA RX | `7A230003-5475-A6A4-654C-8431F6AD49C4` | Notify | Host receives Lua `print()` output and data from Halo |
| AUDIO TX | `7A230005-5475-A6A4-654C-8431F6AD49C4` | Write Without Response, Write | Host streams PCM or LC3 audio to Halo's speaker |
The maximum packet size on each characteristic is the negotiated MTU (up to 512 bytes).
The service also exposes two further characteristics — `7A230004` (Notify) and `7A230006` (Notify) — which you will see when enumerating the service but which the firmware does not use.
{: .note }
Camera images and microphone audio are **not** streamed on dedicated characteristics. Camera image chunks are sent from Halo to host over the regular **LUA RX** characteristic using `frame.bluetooth.send()`. Microphone audio is also sent back on the **LUA RX** characteristic in the same way.
### Battery Service
**Service UUID:** `0x180F` (Standard BLE Battery Service)
| Characteristic | UUID | Permissions | Description |
|----------------|------|-------------|-------------|
| Battery Level | `0x2A19` | Read, Notify | Battery level (0–100%) |
| Battery Power State | `0x2A1A` | Read, Notify | Bitfield: battery presence, charging, and discharging state |
### OTA Service
**Service UUID:** `8D53DC1D-1DB7-4CD3-868B-8A527460AA84`
| Characteristic | UUID | Permissions | Description |
|----------------|------|-------------|-------------|
| SMP | `DA2E7828-FBCE-4E01-AE9E-261174997C48` | Write Without Response, Write, Notify | SMP firmware update control |
Firmware updates use the **MCU-BOOT** scheme over BLE using the [Simple Management Protocol (SMP)](https://docs.zephyrproject.org/latest/services/device_mgmt/smp_svr.html). See [Firmware Updates](#firmware-updates) below.
### LE Audio Service
Halo is also a standard **LE Audio** device: a BAP Unicast Server with a speaker sink and a microphone source using the LC3 codec (8/16 kHz in both directions, with 32/48 kHz capture also available), plus volume control (VCS) and host-side microphone mute (MICS). Hosts with LE Audio support can stream audio to Halo's speaker and record from its microphone through these standard profiles, without using the custom characteristics at all.
{: .note }
An LE Audio stream established by the host takes priority over the custom channels. In particular, an active `frame.microphone` capture is preempted — `frame.microphone.status()` returns `"le_audio"` and `frame.microphone.start()` fails until the host releases the stream.
## Executing Lua Statements Over Bluetooth
Send Lua commands to Halo over Bluetooth using a REPL-like interaction on the **LUA TX** characteristic. Halo evaluates every message and only returns a response if it resulted in a Lua `print()` call, or if an error occurred.
```lua
print('hello world') -- Returns 'hello world' on LUA RX
print(1 + 2) -- Returns '3'
a = 1 + 2 -- Evaluates and stores, no output
1 + 2 -- Returns an error
```
The length of data on LUA TX is limited to the negotiated MTU. To execute larger scripts, first save them to the device filesystem using `frame.file.open()` / `f:write()` / `f:close()`, then execute with `require()`.
Responses on LUA RX are also limited to the MTU. For very long strings, break them into smaller `print()` calls.
To determine the MTU in use: `frame.bluetooth.max_length()` in Lua.
### Bluetooth Lua Execution Sequence

## Sending Data
For binary payloads (e.g. image data, sprite data), prefix the payload with a byte of value `0x01` on the **LUA TX** characteristic. This triggers a callback if one was registered with `frame.bluetooth.receive_callback()`. The maximum data payload per write is best obtained by calling `frame.bluetooth.max_length()` on the device (the usable ATT payload less the `0x01` marker byte, i.e. ATT MTU − 8).
Raw byte data can be returned to the host using `frame.bluetooth.send()`. It is prefixed with `0x01` in the first byte of the **LUA RX** notification.
### Bluetooth Raw Data Exchange Sequence

## Control Characters
While a Lua script is running, Halo will ignore additional Lua strings on LUA TX (raw data with `0x01` prefix is still processed). To interrupt a running script, send one of these single-byte control signals on LUA TX:
| Byte | Signal | Effect |
|------|--------|--------|
| `0x02` | CTRL+B | Reboot device |
| `0x03` | CTRL+C | Interrupt running script |
| `0x04` | CTRL+D | Restart Lua runtime / run `main.lua` |
| `0x05` | CTRL+E | Reset and remove `main.lua` |
| `0x06` | CTRL+F | Exit Lua runtime completely |
| `0x07` | CTRL+G | Remove all files/folders (except settings) |
**Most commonly used:**
- `0x03` (break) — terminate any running script or loop
- `0x04` (reset) — clear all variables and run `main.lua` if it exists
## Lua Main Loop — A Special Case
`require('my_module')` executes the entire file `my_module.lua`. If the file contains a main loop, it may never return. Subsequent Lua REPL commands sent on LUA TX *will not execute* because the previous command hasn't returned — however, raw data (with `0x01` prefix) will still be processed by `receive_callback()`.
**This behavior is the basis of Haloside applications:** once a Lua file is running in a main loop, all host↔Halo communication takes place through raw data messages on **LUA TX** (host→Halo) and **LUA RX** (Halo→host). The Lua loop receives messages from the host via `receive_callback()` and sends data back using `bluetooth.send()`.
Lua loops can be interrupted with the break (`0x03`) and reset (`0x04`) control signals. When first connecting to Halo, it's good practice to send a break signal to ensure the device is in REPL mode before sending new application files.
{: .note }
If `main.lua` exists on the filesystem, it is automatically run after reboot or after a reset (`0x04`) signal. If it contains a main loop, send a break (`0x03`) signal after the reboot (with a short delay) to ensure further Lua REPL commands can execute.
## Camera
Camera images are captured using the Lua camera API (`frame.camera.capture()` / `frame.camera.read()`), and the Lua app is responsible for sending image chunks back to the host using `frame.bluetooth.send()` — which delivers them on the **LUA RX** characteristic.
A typical Lua camera pattern:
```lua
frame.camera.capture({ quality = "HIGH" })
while not frame.camera.image_ready() do frame.sleep(0.05) end
local mtu = frame.bluetooth.max_length()
while true do
local data = frame.camera.read(mtu)
if data == nil then break end
frame.bluetooth.send(data) -- arrives on LUA RX
end
```
## Audio
### Sending audio to Halo (playback)
Audio data for playback is written to the **AUDIO TX** characteristic (`7A230005`). Start the speaker first using `frame.speaker.start()` over the Lua channel, then stream PCM or LC3 audio frames directly to **AUDIO TX** — bypassing the Lua VM for low-latency delivery to the speaker hardware.
### Receiving audio from Halo (recording)
There is no dedicated audio receive characteristic. Microphone audio is sent back to the host via `frame.bluetooth.send()` in Lua, which delivers it on the **LUA RX** characteristic. Start the microphone using `frame.microphone.start()`, then read chunks and send them in the main Lua loop.
LC3 format: 7.5 ms or 10 ms frames, e.g. 16kHz 16-bit mono at 16kbps. (The `duration` values `750` and `1000` in the Lua API are in units of µs/10.)
## Firmware Updates
Halo firmware updates use the **MCU-BOOT** bootloader scheme over BLE, using the [Simple Management Protocol (SMP)](https://docs.zephyrproject.org/latest/services/device_mgmt/smp_svr.html) on the OTA service.
The latest official firmware release is available from the [halo-firmware releases page](https://github.com/brilliantlabsAR/halo-firmware/releases).
For reference implementations of MCU-BOOT DFU over BLE:
- [mcuboot_alif port for Alif Semiconductor devices](https://github.com/alifsemi/mcuboot_alif)
========================================================================
PAGE: Frame (https://docs.brilliant.xyz/frame/frame/)
DESCRIPTION: Technical documentation for the Brilliant Frame.
========================================================================

# Getting started with Frame
Whether you're using Frame with Noa, or making your own apps, you'll find everything you need to know about your Frame hardware here.
## How do I charge my Frame?
Your Frame will automatically power off, and start charging whenever it is placed onto the charging cradle (aka Mister Power).
The charging cradle provides an extra helping of battery power for when you're on the go. To charge both Frame and the charging cradle, use any USB Type-C power supply.
The cradle and Frame when docked together will take around 2 hours to fully charge. The white LED on the cradle will turn off to indicate that charging is complete.

## How do I set the bridge height?
Choosing the correct nose bridge adaptor is key to seeing the full display area. You can choose between 3mm, 2mm or no nose bridge adaptor to set the correct level.

## How do I connect to my Frame for the first time?
Ensure your Frame is charged, and then with the charging cradle connected, use a sim card tool and hold the pairing button for 3 seconds. Then remove the dock, and from any Frame compatible app, such as Noa, press connect, and then tap pair.

## How do I update my Frame?
Whenever software updates are available for your Frame, you'll be notified in your Frame compatible apps. Ensure Frame is well charged before updating to prevent partial updates and having to start again. Be sure to keep the app open and within close range of your Frame during the entire update.
## Where can I download Noa?
Noa is available on both Apple App Store for iOS and Google Play Store for Android. You can also download the [Android APK directly from our Github](https://github.com/brilliantlabsAR/noa-flutter/releases/latest).
**Check out the getting started with Noa playlist [here](https://www.youtube.com/watch?v=olNhbZTx6Lw&list=PLfbaC5GRVJJgSPdN-KWndTld35tihu1Ic)**
## Developer?
Get started making your own apps today. Follow the links below to familiarize yourself with the Frame hardware and Lua API.
========================================================================
PAGE: Hardware (https://docs.brilliant.xyz/frame/hardware/)
DESCRIPTION: A brief overview of how Frame works under the hood.
========================================================================
# Frame Hardware Manual
{: .no_toc }
---
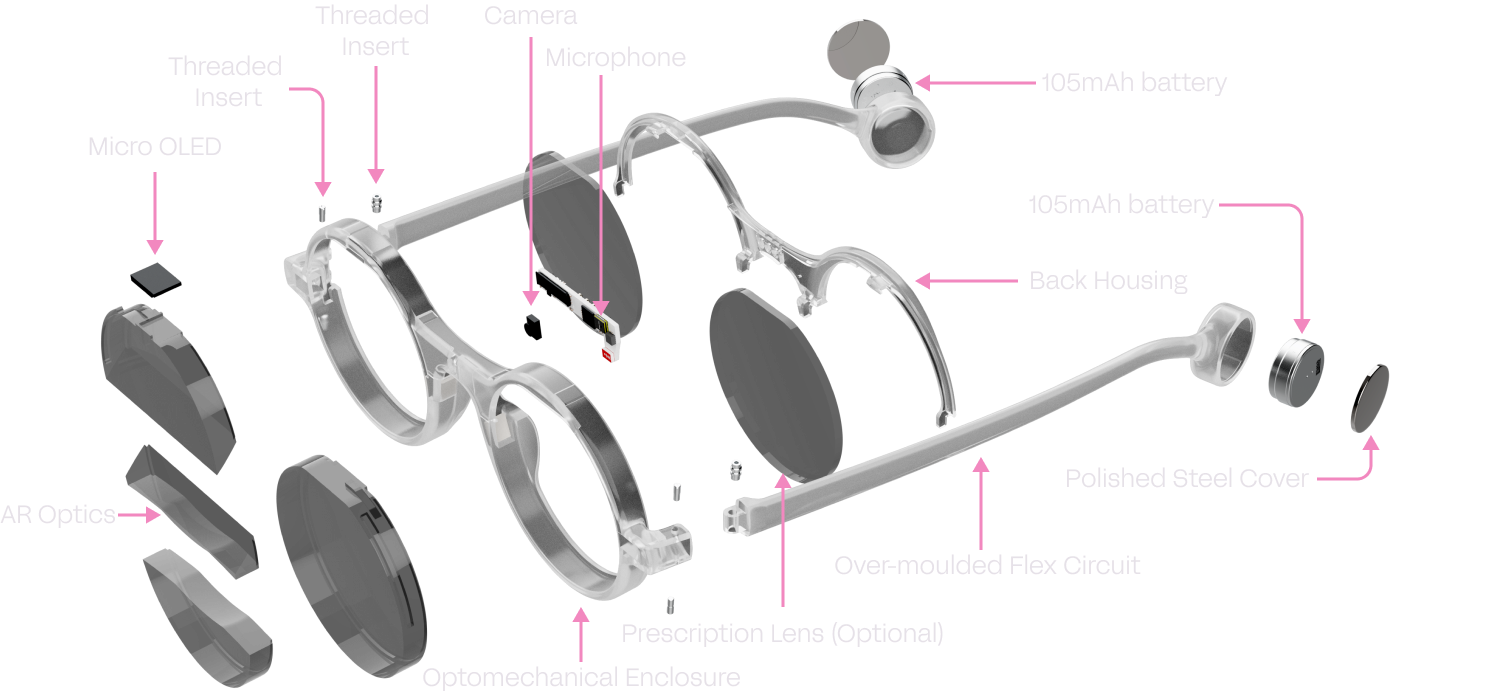
Here you'll find all the details about how Frame works under the hood. For software related information, be sure to also check out the [Frame SDK](/frame/frame-sdk) including [Lua API](/frame/frame-sdk-lua/) pages.
## Key features
{: .no_toc }
- 640x400 color OLED display
- 20° FOV optic
- Optional personalized prescriptions
- Thin and light 6mm lenses (not including optional prescription)
- 720p low power color camera
- Microphone
- FPGA acceleration for graphics and imaging
- Bluetooth 5.3
- 210mAh built-in rechargeable li-ion battery
- 3 axis accelerometer with tap detection
- 3 axis e-compass
- Full featured Lua based OS
- Charging dock with USB Type-C & 140mAh battery
## Example uses:
{: .no_toc }
- Generative AI on the go
- ML based image augmentation
- Computer vision research
- QR code & barcode detection
- Heads up telemetry
- AR app & game design
## Contents
{: .no_toc }
1. TOC
{:toc}
## Hardware block diagram
This diagram shows a general overview of the Frame internal hardware architecture.

---
## Bluetooth MCU
the Bluetooth MCU serves as the main processor for Frame. It handles all network communication and running of user logic. The MCU used is the [nRF52840](https://www.nordicsemi.com/products/nrf52840) from Nordic. It contains a 32bit ARM Cortex-M4F CPU running at 64MHz, 1 MB of flash storage, 256 KB of RAM, and features Bluetooth 5.3 connectivity.
As standard, Frame comes with a feature rich Lua based OS that allows for scripting and remote access fully over Bluetooth. No programming cables, or proprietary software is needed to use the device.
The firmware is fully updatable over the air. If you're using a Frame compatible app, these updates should be automatic, however if you're developing your own apps, take a look at the [Frame SDK Bluetooth Specs page](/frame/frame-sdk-bluetooth-specs/#firmware-updates) to see how you can implement firmware update capability into your own apps.
### Customizing the firmware
Frame is intended to be used with the officially provided firmware from Brilliant, however it is possible to customize the firmware if desired. Note that this will require destructive disassembly of your Frame hardware to access the physical debug port.
If you wish to view the source code, or use it as a starting point for your custom firmware, visit the [Frame codebase repository](https://github.com/brilliantlabsAR/frame-codebase).
The physical debug port of the Bluetooth MCU is located on the back of the Frame PCB. A total of five wires can be connected to a suitable ARM SWD debugger such as a [J-Link probe](https://www.segger.com/products/debug-probes/j-link/) or [Black-Magic probe](https://black-magic.org) to allow for debugging.
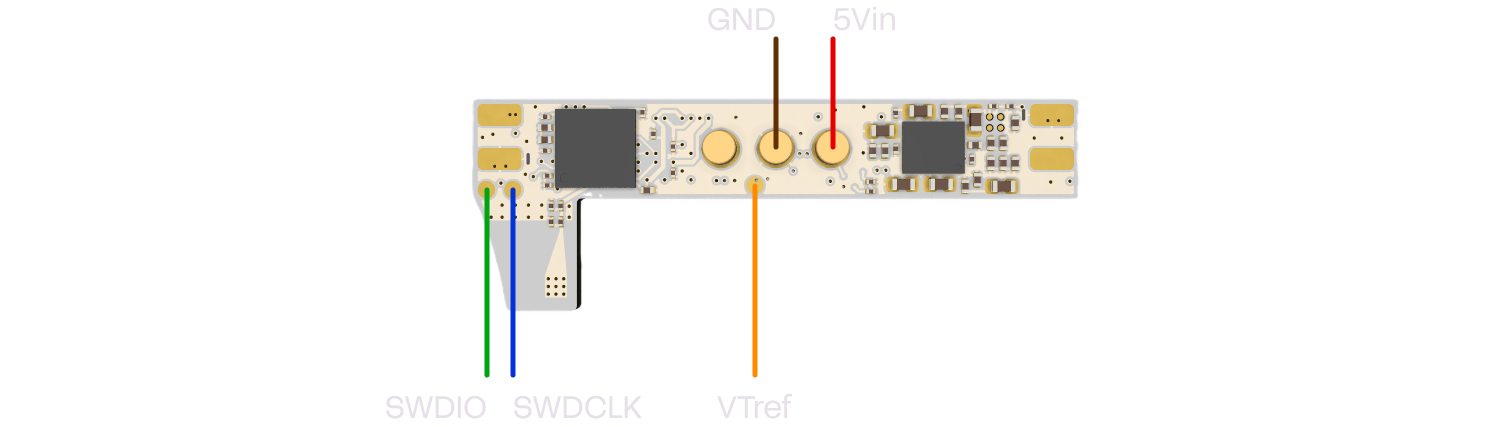
---
## FPGA
The FPGA is used for graphics acceleration of the display, as well as interfacing to the 720p camera sensor. It communicates to the Bluetooth MCU via SPI and is dynamically shutdown off to save power.
The FPGA used is the [Crosslink-NX LIFCL-17](https://www.latticesemi.com/Products/FPGAandCPLD/CrossLink-NX) from Lattice. It features 17k logic cells, 432kb of embedded block RAM, and 2.56Mb of large RAM.
If you wish to view the source code, or use it as a starting point for a custom RTL design, visit the [FPGA section](https://github.com/brilliantlabsAR/frame-codebase/tree/main/source/fpga) of the Frame codebase repository.
The FPGA does not expose a physical programming interface. Therefore the FPGA application is uploaded solely via SPI at boot-up.
---
## Display
The display used in Frame is a 0.23" micro OLED. It features 640x400 RGB pixels and is optically bonded to the prism assembly which directs the image into the user's eye. The result is a transparent floating display with a 20° field of view, and appears about the size of a tablet display at arms length.
The display is connected to the FPGA in 8bit YCbCr mode. 4 wires for the Y channel, and 2 wires each for the Cb and Cr channels. This allows for a total of 255 possible colors shown on the display. In turn, to save memory and ensure fast frame rates, the FPGA RTL is optimized to display a maximum of 16 colors per frame. These colors can be changed on the fly, allowing for large sprite sets and fonts to be efficiently stored within Frame's embedded memory. To better understand how the graphics subsystem of Frame works, check out the [graphics section](https://github.com/brilliantlabsAR/frame-codebase/blob/main/docs/fpga-architecture.md#graphics) of the Frame codebase repository.
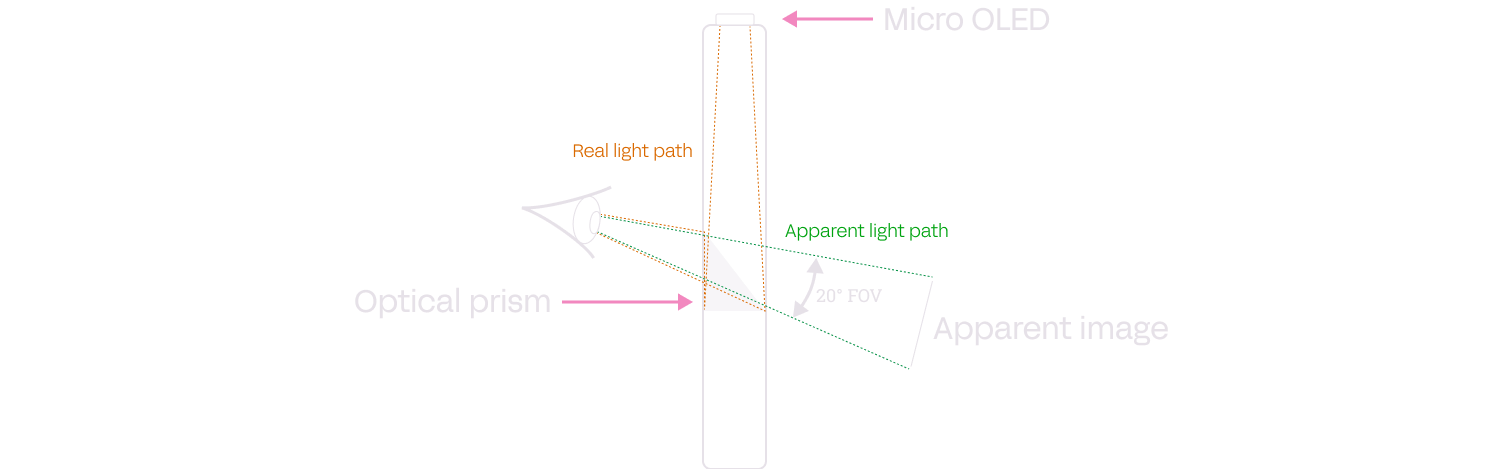
---
## Camera
The front facing camera sensor on Frame is the incredibly small and power efficient [OV09734](https://www.ovt.com/products/ov09734-h16a-2a/) from Omnivision.
The FPGA RTL optimizes images for AI applications such as image recognition and allows the user a large amount of control over resolution, gain and exposure for maximum flexibility.
Images are captured as 1280x720 RGB, but then cropped to 720x720 and converted to YCbCr for memory efficiency and fast downloading over Bluetooth. To better understand how the camera subsystem of Frame works, check out the [camera section](https://github.com/brilliantlabsAR/frame-codebase/blob/main/docs/fpga-architecture.md#camera) of the Frame codebase repository.
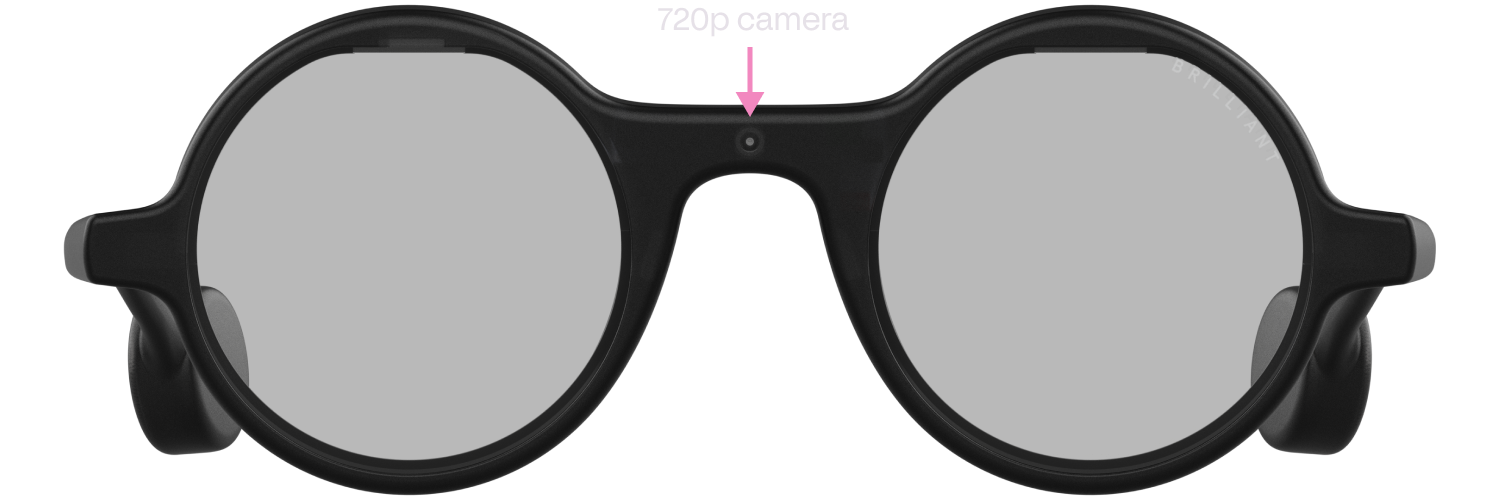
---
## Microphone
Frame features a single [ICS-41351](https://product.tdk.com/system/files/dam/doc/product/sw_piezo/mic/mems-mic/data_sheet/ds-000157-ics-41351-v1.4.pdf) MEMS microphone from TDK. It has a wide dynamic range from -35.5dB to 129.5dB, allowing it to hear everything from soft speech, to loud booming noises.
The microphone is connected directly to the Bluetooth MCU which allows for low power operation and applications such as periodic recording and wake detection. The standard firmware allows for a wide range of recording formats from 4bits to 16bits sample depth, and 4kHz to 20kHz sample rate.
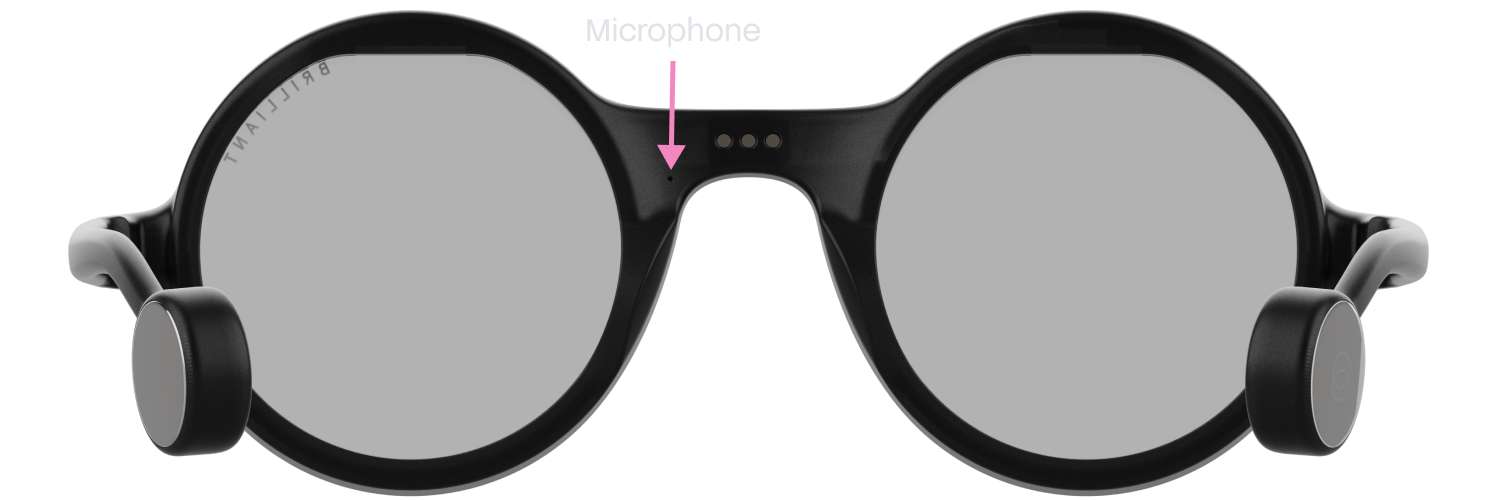
---
## Motion Sensor (IMU)
The IMU on Frame is the 6 axis [MC6470](https://eu.mouser.com/datasheet/2/821/MC6470_Datasheet_APS_048_0033v1_7_1-3003085.pdf) sensor from MEMSIC. It features both an accelerometer and e-compass in a tiny package consuming very little power. Further processing on the Bluetooth MCU calculates the raw X, Y and Z values of both sensing elements into angular values for detecting head position.
An accelerator interrupt line from the IMU is also directly connected to the Bluetooth MCU. This allows for always on detections of taps that can be used to navigate and select UI elements within the user's apps.
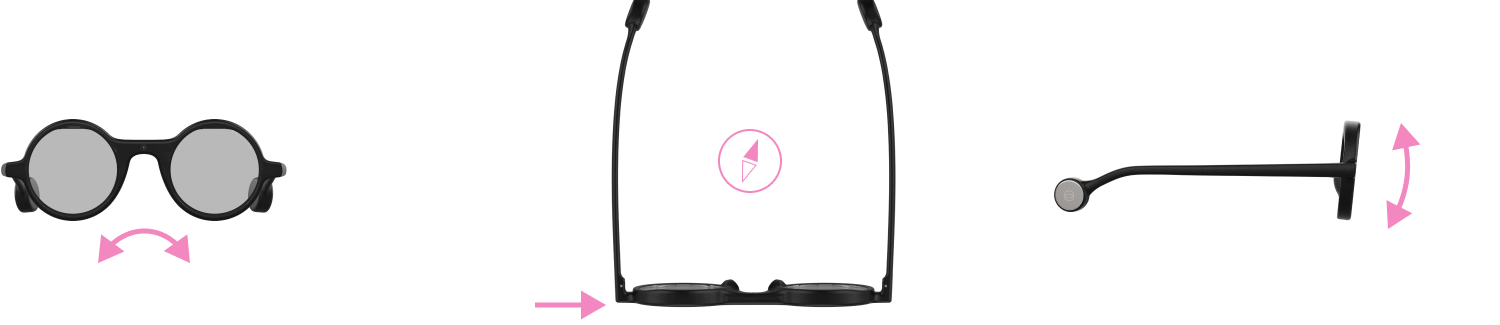
---
## Power
Power is internally distributed within Frame via the [MAX77654](https://www.analog.com/media/en/technical-documentation/data-sheets/max77654.pdf) power management IC from Analog Devices. Each rail is carefully managed and monitored to both protect the components within Frame, as well as ensure lasting performance of the battery.
{: .warning }
> The PMIC is configured from C code baked into the Bluetooth MCU firmware. If you're creating a custom firmware, it's recommended to avoid changing any of the PMIC settings without carefully studying the schematics and PMIC datasheet. These settings can easily over-volt components damaging them, as well as damage the battery.
### Battery charging
The PMIC includes an integrated battery charger for the two built in 105mAh li-ion cells. Regulation is based on time, temperature and the current operating state of Frame. An analog pin provides the ability to monitor battery voltage and current within the firmware, and can be used to estimate battery life.
---
## Charging cradle (Mister Power)
The charging cradle functions to both charge Frame via the 5V terminal on the back of the glasses, as well as allowing for factory resetting and un-pairing of Frame from any connected device.
It also contains a 140mAh rechargeable li-ion cell which allows for a top-up of Frame's internal battery while on the go. The charging cradle itself, and in turn Frame, can be charged using any USB Type-C power supply.
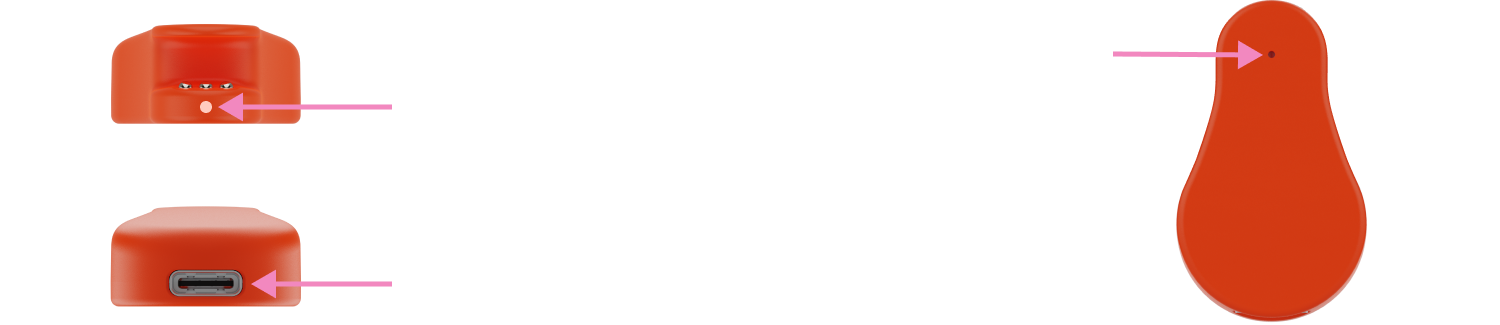
---
## Schematics
### Frame
### Charging cradle
---
## Mechanical
**Details coming soon**
### Frame
[Download the 3D Model in STL format](/frame/frame.stl)
### Charging cradle
[Download the 3D Model in STL format](/frame/charging-cradle.stl)
### Prescription (Rx) clip
[Download the 3D Model in STL format](/frame/frame-rx-clip.stl)
---
## Device characteristics
Typical and absolute device characteristics are shown below. To get the best lifetime of Frame, it's recommended to keep within these limits.
### Typical characteristics
| | Min | Typ | Max |
|:------------------------|:------:|:-----:|:------:|
| Frame operating current | 45mA | 80mA | 100mA |
| Frame sleep current | - | 580uA | - |
| Frame shutdown current | - | 132uA | - |
| Frame charging current | 1.5mA | - | 225mA |
| Charging cradle current | - | - | 400mA |
| Bluetooth radio power | -20dBm | - | 8dBm |
| Bluetooth sensitivity | - | - | -95dBm |
### Maximum ratings
| | Min | Typ | Max |
|:----------------------------|:-----:|:----:|:----:|
| Frame charging voltage | -0.3V | 5.1V | 6.4V |
| Charging cradle USB voltage | -0.3V | 5.1V | 7V |
| Operating temperature | 0°C | - | 45°C |
| Storage temperature | -20°C | - | 60°C |
---
## Safety & limitation of liability
### Safety
Brilliant Labs' devices can obscure your vision and should not be used while driving or operating dangerous equipment. Additionally long periods of use may cause eye strain, headaches and motion sickness. Brilliant Labs' devices can also display bright flashing images so may not be suitable for those who are susceptible to light sensitivity.
### Critical applications
Brilliant Labs' devices are intended for consumer and R&D applications. It is not verified for use where performance and accuracy would be critical to human health, safety or mission critical use.
### Lithium batteries
Lithium batteries can be dangerous if mishandled. Do not expose Brilliant Labs' devices to excess temperatures, fire or liquids. Do not try to remove the battery as the terminals can become shorted and result in the battery overheating or catching fire. Once the product reaches the end of it's life, dispose it safely according to your local regulations, such as e-waste collection points where any volatile components can be properly contained and handled.
### FCC notice
This device complies with part 15 of the FCC Rules. Operation is subject to the following two conditions: (1) This device may not cause harmful interference, and (2) this device must accept any interference received, including interference that may cause undesired operation.
Any Changes or modifications not expressly approved by the party responsible for compliance could void the user's authority to operate the equipment. Note: This equipment has been tested and found to comply with the limits for a Class B digital device, pursuant to part 15 of the FCC Rules. These limits are designed to provide reasonable protection against harmful interference in a residential installation. This equipment generates uses and can radiate radio frequency energy and, if not installed and used in accordance with the instructions, may cause harmful interference to radio communications. However, there is no guarantee that interference will not occur in a particular installation. If this equipment does cause harmful interference to radio or television reception, which can be determined by turning the equipment off and on, the user is encouraged to try to correct the interference by one or more of the following measures:
- Reorient or relocate the receiving antenna.
- Increase the separation between the equipment and receiver.
- Connect the equipment into an outlet on a circuit different from that to which the receiver is connected.
- Consult the dealer or an experienced radio/TV technician for help.
The device has been evaluated to meet general RF exposure requirement. The device can be used in portable exposure condition without restriction.
### Limitation of liability
Brilliant Labs provides technical data, including design resources, examples, applications, design advice, tools, safety information and other resources "as is" and disclaims all warranties, express and implied, including without limitation any implied warranties or merchantability, fitness for a particular purpose or non-infringement of third party intellectual property rights.
These resources are intended for skilled developers. You are solely responsible for selecting the appropriate products for your application, designing, validating and testing your application, and ensuring your application meets applicable standards, and other safety, security, regulatory or other requirements.
Brilliant Labs reserves the right to change the circuitry and specifications without notice at any time. The parametric values quoted in this manual are provided for guidance only.
The resources and products are provided subject to our [terms and conditions](https://brilliant.xyz/pages/terms-conditions).
========================================================================
PAGE: Frame SDK (https://docs.brilliant.xyz/frame/frame-sdk/)
DESCRIPTION: A guide on how to develop your own applications for Frame.
========================================================================
# Building Apps with the Frame SDK
{: .no_toc }
---
1. TOC
{:toc}
---
## How Do Apps Run on Frame?
Frame runs a power-efficient System-on-a-Chip (SoC) with relatively limited memory and processing power compared to modern smartphones. Rather than installing apps directly on Frame, it typically functions as a peripheral accessory for "host" apps running on computers or mobile devices. These host apps communicate with Frame via Bluetooth to control features like the camera, microphone, and display.
While you may write Lua scripts that execute on Frame for specific behaviors, your host app primarily drives the logic while Frame runs a simple event handler loop. For example, the Noa mobile app connects to Frame, receives sensor data over Bluetooth, processes it, and sends content back to Frame for display.
Frame doesn't have its own app launcher or traditional app installation system. To share your Frame apps with others, publish your host app through normal distribution channels like App Store, Google Play, or open source repositories. Of course if you build something cool, let us know and we will be happy to share it with the community.
## Getting Started
For the quickest start:
* If you're using a supported platform, begin with our SDK documentation for [Python](/frame/frame-sdk-python) or [Flutter](/frame/frame-sdk-flutter), then explore the [Lua API](/frame/frame-sdk-lua) for advanced features.
* For other platforms, use the [Lua API](/frame/frame-sdk-lua) directly over Bluetooth with the [Bluetooth LE API documentation](/frame/frame-sdk-bluetooth-specs).
* The current SDK packages live in the [Brilliant SDK monorepo](https://github.com/brilliantlabsAR/brilliant_sdk){:target="_blank"} (`brilliant-ble` / `brilliant-msg` / `brilliant-sdk` on PyPI, pub.dev and npm) and support **both Frame and Halo**. The `frame-*` packages on the platform pages are their direct predecessors and still work.
* Note: Legacy SDKs ([frame-sdk-python](https://pypi.org/project/frame-sdk/){:target="_blank"}, [frame-sdk-flutter](https://pub.dev/packages/frame_sdk){:target="_blank"}, [frameutils-python](https://pypi.org/project/frameutils/){:target="_blank"}) remain functional, but new projects should use the current SDK to access new features like image display and realtime streaming.
# Development Options for Frame
1. Use Platform SDKs **(Recommended)**
* Build with supported platforms:
* [Python](/frame/frame-sdk-python) (Mac, Linux, Windows)
* [Flutter](/frame/frame-sdk-flutter) (iOS/Android)
* Benefits: Common tasks are simplified, many examples to follow
2. Communicate via Bluetooth LE
* Use any platform with Bluetooth LE capabilities
* Offers full control but requires Bluetooth LE development experience
* See [Bluetooth LE API documentation](/frame/frame-sdk-bluetooth-specs)
3. Customize Firmware **(Advanced)**
* Requires hardware development expertise
* Provides complete control of Frame hardware
* See [firmware customization and hardware documentation](/frame/hardware#customizing-the-firmware)
The typical development pattern involves creating a Python desktop application or Flutter mobile app that uses the Frame SDK to communicate with Frame over Bluetooth, abstracting away many Lua and BTLE details.
## Platform SDK Development
{: .note }
This recommended approach offers quick and reliable Frame app development for Python and Flutter platforms, with each of these platform SDKs under active development.
Our platform SDKs simplify the low-level Bluetooth and Lua APIs, eliminating the need to write boilerplate code for device discovery, connection, and communication.
Familiarity with the [Lua API](/frame/frame-sdk-lua) remains useful for main application event loops, `main.lua` scripts that run at wakeup, or custom on-device processing.
Check the [Python](/frame/frame-sdk-python) or [Flutter](/frame/frame-sdk-flutter) SDK documentation for implementation details.
## Direct Bluetooth LE Development
For developers comfortable with Bluetooth LE, this approach offers maximum flexibility but requires a greater understanding of Bluetooth technology.
After establishing BTLE communication, you'll use Lua to control Frame's functions. Frame provides a Lua virtual machine where you can execute scripts or use the Lua REPL over the BTLE interface.
Refer to the [Bluetooth LE API documentation](/frame/frame-sdk-bluetooth-specs) and the [full Lua API reference](/frame/frame-sdk-lua) for details on Frame's capabilities.
During development, you can also use the [AR Studio extension for VSCode](/frame/frame-sdk-lua#ar-studio) to directly write and execute Lua code on Frame.
## Firmware Customization
Frame is developed by hackers for hackers, so even though we don't recommend it for most users, Frame's open-source firmware can be customized. Find the official firmware [on GitHub](https://github.com/brilliantlabsAR/frame-codebase).
For more details on how to customize the firmware, see the [hardware documentation](/frame/hardware#customizing-the-firmware).
========================================================================
PAGE: Python (https://docs.brilliant.xyz/frame/frame-sdk-python/)
DESCRIPTION: An overview of the Frame SDK for building Python apps that talk to Frame AR glasses.
========================================================================
# Frame SDK for Python
{: .no_toc }
---
The `frame-*` packages documented on this page still work, but active development has moved to their renamed successors in the [Brilliant SDK monorepo](https://github.com/brilliantlabsAR/brilliant_sdk){:target="_blank"}: [brilliant-ble](https://pypi.org/project/brilliant-ble/){:target="_blank"} and [brilliant-msg](https://pypi.org/project/brilliant-msg/){:target="_blank"} support **both Frame and Halo** with the same API (see the [migration guide](https://github.com/brilliantlabsAR/brilliant_sdk/blob/main/python/MIGRATION.md){:target="_blank"}). New projects should start there — the [Halo Python SDK page](/halo/halo-sdk-python) documents the current packages.
{: .note }
The Frame SDK for Python is available in a low-level library ([frame-ble](https://pypi.org/project/frame-ble/)) for Bluetooth LE connectivity using [Bleak](https://github.com/hbldh/bleak) with a limited Lua REPL, and an application-level library ([frame-msg](https://pypi.org/project/frame-msg/)) for passing rich objects between your host program and Frame, such as images, streamed audio, IMU data and rasterized text.
---
1. TOC
{:toc}
---
## `frame-ble` package: low-level connectivity
| [](https://pypi.org/project/frame-ble/){:target="_blank"} | [API Reference](https://frame-ble-python.readthedocs.io/){:target="_blank"} | [Source](https://github.com/CitizenOneX/frame_ble_python){:target="_blank"} | [Examples](https://github.com/CitizenOneX/frame_examples_python/tree/main/frame_ble){:target="_blank"} |
The `FrameBle` class allows a host to connect to Frame, initiating pairing if required. A sequence of Lua strings can be sent to Frame for execution, optionally returning their results as strings. Transmitted and received strings must be shorter than the Bluetooth MTU (`FrameBle.max_lua_payload()`).
[Frame-specific Lua APIs](frame-sdk-lua.md) can be called to draw on the display, sample the accelerometer, put Frame into firmware update mode, set the tap and user data callbacks, and more.
In addition to Lua strings, `FrameBle` can also send control commands (break and reset), as well as custom user data messages that can be handled by a user-defined data handler function on Frame. See [Talking to Frame Over Bluetooth](frame-sdk-bluetooth-specs.md) for more details.
Consult the [API Reference](https://frame-ble-python.readthedocs.io/){:target="_blank"} for the complete list of functions available in `frame-ble`, and the [Examples repo](https://github.com/CitizenOneX/frame_examples_python/tree/main/frame_ble){:target="_blank"} to see them in action. Don't see an example you need? Ask in [Discord](https://discord.com/invite/vDS9X7gdwg){:target="_blank"} to have one added.
Note: It is expected that most application developers will prefer to use `FrameMsg` from the [frame-msg package](https://pypi.org/project/frame-msg/) to make use of first-class messages and efficient transport for sprites, images, audio clips, and to avoid having to wrangle Bluetooth packet fragmentation and assembly. The `frame-ble` package, with only a dependency on the `bleak` library, is still a handy choice for `"Hello, World!"`, simple utilities, or as the basis of a custom application framework in Python.
### Example usage
{: .no_toc }
```bash
pip install frame-ble
```
```python
import asyncio
from frame_ble import FrameBle
async def main():
frame = FrameBle()
try:
await frame.connect()
await frame.send_lua("frame.display.text('Hello, Frame!', 1, 1);frame.display.show();print(nil)", await_print=True)
await frame.disconnect()
except Exception as e:
print(f"Not connected to Frame: {e}")
return
if __name__ == "__main__":
asyncio.run(main())
```
| Selected Examples |
|-------------------|
| ["Hello, World!"](https://github.com/CitizenOneX/frame_examples_python/blob/main/frame_ble/hello_world.py){:target="_blank"} |
| [Clear the display](https://github.com/CitizenOneX/frame_examples_python/blob/main/frame_ble/clear_display.py){:target="_blank"} |
| [Echo printed outputs from Lua code executing on Frame](https://github.com/CitizenOneX/frame_examples_python/blob/main/frame_ble/echo.py){:target="_blank"} |
| [Upload and invoke a custom Lua function from a file](https://github.com/CitizenOneX/frame_examples_python/blob/main/frame_ble/custom_lua_functions.py){:target="_blank"} |
| [Upload and invoke a function demonstrating lz4 decompression on Frame](https://github.com/CitizenOneX/frame_examples_python/blob/main/frame_ble/decompression.py){:target="_blank"} |
---
## `frame-msg` package: application-level messaging
| [](https://pypi.org/project/frame-msg/){:target="_blank"} | [API Reference](https://frame-msg-python.readthedocs.io/){:target="_blank"} | [Source](https://github.com/CitizenOneX/frame_msg_python){:target="_blank"} | [Examples](https://github.com/CitizenOneX/frame_examples_python/tree/main/frame_msg){:target="_blank"} |
`frame-msg` enables both the hostside and Frameside halves of an application to **communicate using richly typed messages** - for example transmitting Sprites to Frame with width, height, palette data and pixel data attributes. (See the code below for an example.)
Additionally, `frame-msg` uses a programming model in which **a main event loop is running on Frame**. As a result, messages are exchanged asychronously and handled in an event-driven way. This is in contrast to the "Lua REPL" model, in which single statements are sent to Frame to be executed, and the host attempts to block until execution has completed. In a REPL-style model, it would not be practical to create an application that for example continuously streams audio from Frame to host, and simultaneously sends text back for display (a live translation app). In contrast, with a main event loop running on Frame it is possible to send some audio back to the host if some is available, and check for messages indicating text is ready for display, then loop around again.
### How it works
{: .no_toc }
In order to **serialize and deserialize large objects**, `frame-msg` makes use of `FrameBle`'s `send_message()` function that **fragments large payloads** into multiple Bluetooth packets marked with a matching **`msg_code`**, and **efficiently reassembles them on Frame**. After parsing the reconstructed payload into the desired type, a complete object is made available for the application's main loop in Lua.
Handling **rich message types** is done by providing symmetrical **packing code and parsing code** for standard types.
* For "Transmit" (`Tx`) message types, the packing (serialization) code is in the Python type (e.g. `TxSprite.pack()`) and the parsing (deserialization) code is in the corresponding Lua module (`sprite.lua` / `parse_sprite()`).
* For "Receive" (`Rx`) message types, e.g. `RxPhoto`, the serialization code is present implicitly in the Lua module `camera.lua` in `capture_and_send()`, and the deserialization code is present in the `RxPhoto` class.
This approach presents a natural extension point for user-defined types too: a custom application-specific message might contain an icon, a heading and some detailed text - and this can all be sent together and used all at once on Frame to update the display. By implementing the packing and parsing code for user-defined types, custom objects can be used in applications in the same way as the standard types.
### Startup sequence
{: .no_toc }
`frame-msg` applications tend to follow a startup sequence that ensures Frame is in a known state for the application to run, namely:
* Optionally send a break/reset/break signal sequence to ensure that Frame is in Lua REPL mode and its memory is freshly cleared
* Upload standard Lua libraries to Frame: `data` for handling all messaging, plus any others to support specific messages the application uses (e.g. `sprite`, `plain_text`, etc.) Unless specified otherwise, [minified Lua code files](https://en.wikipedia.org/wiki/Minification_(programming)) are uploaded, so make sure your Frameside app includes `sprite.min` in this case.
* Upload the main Frame application Lua file (e.g. `my_frame_app.lua`). This can often be an exact copy of an example main Lua file that handles the same message types.
* Start the main application loop on Frame (after which no Lua REPL commands will be accepted by Frame).
After the Frameside application reports that it has started, the hostside and Frameside application halves begin messaging each other asynchronously: passing text, images, audio etc.
## Example usage
{: .no_toc }
```bash
pip install frame-msg
```
`sprite_display.py`
```python
import asyncio
from pathlib import Path
from frame_msg import FrameMsg, TxSprite
async def main():
"""
Displays sample images on the Frame display.
The images are indexed (palette) PNG images, in 2, 4,
and 16 colors (that is, 1-, 2- and 4-bits-per-pixel).
"""
frame = FrameMsg()
try:
await frame.connect()
# Let the user know we're starting
await frame.print_short_text('Loading...')
# send the std lua files to Frame that handle data accumulation and sprite parsing
await frame.upload_stdlua_libs(lib_names=['data', 'sprite'])
# Send the main lua application from this project to Frame that will run the app
await frame.upload_frame_app(local_filename="lua/sprite_frame_app.lua")
# attach the print response handler so we can see stdout from Frame Lua print() statements
frame.attach_print_response_handler()
# "require" the main frame_app lua file to run it, and block until it has started.
await frame.start_frame_app()
# send the 1-bit image to Frame in chunks
sprite = TxSprite.from_indexed_png_bytes(Path("images/logo_1bit.png").read_bytes())
await frame.send_message(0x20, sprite.pack())
# send a 2-bit image
sprite = TxSprite.from_indexed_png_bytes(Path("images/street_2bit.png").read_bytes())
await frame.send_message(0x20, sprite.pack())
# send a 4-bit image
sprite = TxSprite.from_indexed_png_bytes(Path("images/hotdog_4bit.png").read_bytes())
await frame.send_message(0x20, sprite.pack())
await asyncio.sleep(5.0)
# unhook the print handler
frame.detach_print_response_handler()
# break out of the frame app loop and reboot Frame
await frame.stop_frame_app()
except Exception as e:
print(f"An error occurred: {e}")
finally:
# clean disconnection
await frame.disconnect()
if __name__ == "__main__":
asyncio.run(main())
```
`sprite_frame_app.lua`
```lua
local data = require('data.min')
local sprite = require('sprite.min')
-- Phone to Frame flags
USER_SPRITE = 0x20
-- register the message parsers so they are automatically called when matching data comes in
data.parsers[USER_SPRITE] = sprite.parse_sprite
-- Main app loop
function app_loop()
frame.display.text('Frame App Started', 1, 1)
frame.display.show()
-- tell the host program that the frameside app is ready (waiting on await_print)
print('Frame app is running')
while true do
rc, err = pcall(
function()
-- process any raw data items, if ready
local items_ready = data.process_raw_items()
-- one or more full messages received
if items_ready > 0 then
if data.app_data[USER_SPRITE] ~= nil then
local spr = data.app_data[USER_SPRITE]
-- set the palette in case it's different to the standard palette
sprite.set_palette(spr.num_colors, spr.palette_data)
-- show the sprite
frame.display.bitmap(1, 1, spr.width, 2^spr.bpp, 0, spr.pixel_data)
frame.display.show()
-- clear the object and run the garbage collector right away
data.app_data[USER_SPRITE] = nil
collectgarbage('collect')
end
end
-- can't sleep for long, might be lots of incoming bluetooth data to process
frame.sleep(0.001)
end
)
-- Catch an error (including the break signal) here
if rc == false then
-- send the error back on the stdout stream and clear the display
print(err)
frame.display.text(' ', 1, 1)
frame.display.show()
break
end
end
end
-- run the main app loop
app_loop()
```
| Selected Examples | Python | Lua |
|-------------------|--------|-----|
| Display a Sprite | [Python](https://github.com/CitizenOneX/frame_examples_python/blob/main/frame_msg/sprite_ind_png.py){:target="_blank"} | [Lua](https://github.com/CitizenOneX/frame_examples_python/blob/main/frame_msg/lua/sprite_frame_app.lua){:target="_blank"} |
| Display Unicode Text | [Python](https://github.com/CitizenOneX/frame_examples_python/blob/main/frame_msg/text_sprite_block.py){:target="_blank"} | [Lua](https://github.com/CitizenOneX/frame_examples_python/blob/main/frame_msg/lua/text_sprite_block_frame_app.lua){:target="_blank"} |
| Take a photo (auto exposure) | [Python](https://github.com/CitizenOneX/frame_examples_python/blob/main/frame_msg/camera.py){:target="_blank"} | [Lua](https://github.com/CitizenOneX/frame_examples_python/blob/main/frame_msg/lua/camera_frame_app.lua){:target="_blank"} |
| Take a photo (manual exposure) | [Python](https://github.com/CitizenOneX/frame_examples_python/blob/main/frame_msg/manual_exposure.py){:target="_blank"} | [Lua](https://github.com/CitizenOneX/frame_examples_python/blob/main/frame_msg/lua/manualexp_frame_app.lua){:target="_blank"} |
| Live camera feed | [Python](https://github.com/CitizenOneX/frame_examples_python/blob/main/frame_msg/live-camera-feed-with-params.py){:target="_blank"} | [Lua](https://github.com/CitizenOneX/frame_examples_python/blob/main/frame_msg/lua/live_camera_frame_app.lua){:target="_blank"} |
| Stream audio | [Python](https://github.com/CitizenOneX/frame_examples_python/blob/main/frame_msg/audio_stream.py){:target="_blank"} | [Lua](https://github.com/CitizenOneX/frame_examples_python/blob/main/frame_msg/lua/audio_frame_app.lua){:target="_blank"} |
---
## Legacy SDKs
Note: Legacy SDK packages are available for [frame-sdk](https://pypi.org/project/frame-sdk/) and [frameutils](https://pypi.org/project/frame-utilities-for-python/) as [previously documented here](https://github.com/brilliantlabsAR/docs/blob/c33420dc55eb12b27f5a804b9a5a82247d471ae9/frame/building-apps-sdk.md).
In order to allow richer experiences on Frame including image display and audio streaming, the decision was made to move to an SDK model based on asynchronous message-passing between a main application loop running on the host, and a main event loop running on Frame. This approach is used in both the [Python](https://pypi.org/project/frame-msg/) and [Flutter](https://pub.dev/packages/frame_msg) SDKs.
While this requires a slight adjustment from the way the legacy SDKs were used, there are [many examples provided](https://github.com/CitizenOneX/frame_python_examples) and a [helpful community in Discord](https://discord.com/invite/vDS9X7gdwg) to help you build your project.
========================================================================
PAGE: Flutter (https://docs.brilliant.xyz/frame/frame-sdk-flutter/)
DESCRIPTION: An overview of the Frame SDK for building Flutter mobile apps that talk to Frame AR glasses.
========================================================================
# Frame SDK for Flutter
{: .no_toc }
---
The `frame-*` packages documented on this page still work, but active development has moved to their renamed successors in the [Brilliant SDK monorepo](https://github.com/brilliantlabsAR/brilliant_sdk){:target="_blank"}: [brilliant_ble](https://pub.dev/packages/brilliant_ble){:target="_blank"}, [brilliant_msg](https://pub.dev/packages/brilliant_msg){:target="_blank"} and [simple_brilliant_app](https://pub.dev/packages/simple_brilliant_app){:target="_blank"} support **both Frame and Halo** with the same API (see the [migration guide](https://github.com/brilliantlabsAR/brilliant_sdk/blob/main/flutter/MIGRATION.md){:target="_blank"}). New projects should start there — the [Halo Flutter SDK page](/halo/halo-sdk-flutter) documents the current packages.
{: .note }
The Frame SDK for Flutter is available in a low-level library ([frame_ble](https://pub.dev/packages/frame_ble/)) for Bluetooth LE connectivity using [Flutter Blue Plus](https://pub.dev/packages/flutter_blue_plus) with a limited Lua REPL, and an application-level library ([frame_msg](https://pub.dev/packages/frame_msg/)) for passing rich objects between your host program and Frame, such as images, streamed audio, IMU data and rasterized text.
Additionally for Flutter developers the community has contributed even higher-level options for getting started quickly with single-page demo Frame applications, including specific helpers for computer vision pipelines.
---
1. TOC
{:toc}
---
## `frame_ble` package: low-level connectivity
| [](https://pub.dev/packages/frame_ble){:target="_blank"} | [API Reference](https://pub.dev/documentation/frame_ble/latest/){:target="_blank"} | [Source](https://github.com/CitizenOneX/frame_ble){:target="_blank"} | [Example](https://github.com/CitizenOneX/frame_ble/tree/main/example){:target="_blank"} |
The `BrilliantBluetooth` class allows a host to connect to Frame, initiating pairing if required. A sequence of Lua strings can be sent to Frame for execution, optionally returning their results as strings. Transmitted and received strings must be shorter than the Bluetooth MTU (`BrilliantDevice.maxStringLength()`).
[Frame-specific Lua APIs](frame-sdk-lua.md) can be called to draw on the display, sample the accelerometer, put Frame into firmware update mode, set the tap and user data callbacks, and more.
In addition to Lua strings, `BrilliantDevice` can also send control commands (break and reset), as well as custom user data messages that can be handled by a user-defined data handler function on Frame. See [Talking to Frame Over Bluetooth](frame-sdk-bluetooth-specs.md) for more details.
Consult the [API Reference](https://pub.dev/documentation/frame_ble/latest/){:target="_blank"} for the complete list of functions available in `frame_ble`, and the [Example](https://github.com/CitizenOneX/frame_ble/blob/main/example/lib/main.dart){:target="_blank"} to see them in action. Don't see an example you need? Ask in [Discord](https://discord.com/invite/vDS9X7gdwg){:target="_blank"} to have one added.
Note: It is expected that most application developers will prefer to use the [frame_msg package](https://pub.dev/packages/frame_msg) to make use of first-class messages and efficient transport for sprites, images, audio clips, and to avoid having to wrangle Bluetooth packet fragmentation and assembly. The `frame_ble` package, with only a dependency on the `flutter_blue_plus` library, is still a handy choice for `"Hello, World!"`, simple utilities, or as the basis of a custom application framework in Flutter.
Note: Frame SDK for Flutter is under active development and it is expected that some `frame_ble` classes may change to harmonize with the Python SDK naming, while retaining some differences due to the mobile context.
### Example usage
{: .no_toc }
```dart
// ...
Future _showCounterOnFrame() async {
// connect to Frame the first time
if (_frame == null) {
// request permission to use Bluetooth
try {
await BrilliantBluetooth.requestPermission();
} catch (e) {
print('Error requesting permission to use Bluetooth: $e');
return;
}
// look for a Frame and connect to it
BrilliantScannedDevice? scannedFrame;
try {
scannedFrame = await BrilliantBluetooth.scan().first;
} catch (e) {
print('Error scanning for Frame: $e');
return;
}
try {
// connect to the scanned Frame
_frame = await BrilliantBluetooth.connect(scannedFrame);
print('Found Frame: $_frame');
}
catch (e) {
print('Error connecting to Frame: $e');
return;
}
// send a break signal to stop any running Lua main loop
await _frame!.sendBreakSignal();
}
// send the counter to Frame for display
if (_frame?.state == BrilliantConnectionState.connected) {
await _frame!.sendString(
'frame.display.text("Hello, World! ($_counter)", 1, 1) frame.display.show()',
awaitResponse: false
);
}
else {
print('Frame is not connected');
_frame = null;
}
}
// ...
```
| Selected Examples |
|-------------------|
| ["Hello, World!"](https://github.com/CitizenOneX/frame_ble/blob/main/example/lib/main.dart){:target="_blank"} |
---
## `frame_msg` package: application-level messaging
| [](https://pub.dev/packages/frame_msg){:target="_blank"} | [API Reference](https://pub.dev/documentation/frame_msg/latest/){:target="_blank"} | [Source](https://github.com/CitizenOneX/frame_msg){:target="_blank"} | Example |
`frame-msg` enables both the hostside and Frameside halves of an application to **communicate using richly typed messages** - for example transmitting Sprites to Frame with width, height, palette data and pixel data attributes. (See the code below for an example.)
Additionally, `frame-msg` uses a programming model in which **a main event loop is running on Frame**. As a result, messages are exchanged asychronously and handled in an event-driven way. This is in contrast to the "Lua REPL" model, in which single statements are sent to Frame to be executed, and the host attempts to block until execution has completed. In a REPL-style model, it would not be practical to create an application that for example continuously streams audio from Frame to host, and simultaneously sends text back for display (a live translation app). In contrast, with a main event loop running on Frame it is possible to send some audio back to the host if some is available, and check for messages indicating text is ready for display, then loop around again.
### How it works
{: .no_toc }
In order to **serialize and deserialize large objects**, use `frame_ble`'s `BrilliantDevice.send_message()` function that **fragments large payloads** into multiple Bluetooth packets marked with a matching **`msg_code`**, and **efficiently reassembles them on Frame**. After parsing the reconstructed payload into the desired type, a complete object is made available for the application's main loop in Lua.
Handling **rich message types** is done by providing symmetrical **packing code and parsing code** for standard types.
* For "Transmit" (`Tx`) message types, the packing (serialization) code is in the Dart/Flutter type (e.g. `TxSprite.pack()`) and the parsing (deserialization) code is in the corresponding Lua module (`sprite.lua` / `parse_sprite()`).
* For "Receive" (`Rx`) message types, e.g. `RxPhoto`, the serialization code is present implicitly in the Lua module `camera.lua` in `capture_and_send()`, and the deserialization code is present in the `RxPhoto` class.
This approach presents a natural extension point for user-defined types too: a custom application-specific message might contain an icon, a heading and some detailed text - and this can all be sent together and used all at once on Frame to update the display. By implementing the packing and parsing code for user-defined types, custom objects can be used in applications in the same way as the standard types.
### Startup sequence
{: .no_toc }
`frame-msg` applications tend to follow a startup sequence that ensures Frame is in a known state for the application to run, namely:
* Optionally send a break/reset/break signal sequence to ensure that Frame is in Lua REPL mode and its memory is freshly cleared
* Upload standard Lua libraries to Frame: `data` for handling all messaging, plus any others to support specific messages the application uses (e.g. `sprite`, `plain_text`, etc.)
* Upload the main Frame application Lua file (e.g. `my_frame_app.lua`). This can often be an exact copy of an example main Lua file that handles the same message types.
* Start the main application loop on Frame (after which no Lua REPL commands will be accepted by Frame).
After the Frameside application reports that it has started, the hostside and Frameside application halves begin messaging each other asynchronously: passing text, images, audio etc.
## Example usage
{: .no_toc }
`sprite_display.dart`
```dart
// ...
// connect to Frame using `frame-ble` in the usual way
// frame = await BrilliantBluetooth.connect(scannedFrame);
// ...
Future run() async {
// Open the file picker
FilePickerResult? result = await FilePicker.platform.pickFiles(
type: FileType.custom,
allowedExtensions: ['png'],
);
if (result != null) {
File file = File(result.files.single.path!);
Uint8List pngBytes = await file.readAsBytes();
// send the Sprite to Frame
var msg = TxSprite.fromPngBytes(pngBytes: pngBytes);
await frame!.sendMessage(0x20, msg.pack());
}
}
// ...
```
`sprite_frame_app.lua`
```lua
local data = require('data.min')
local sprite = require('sprite.min')
-- Phone to Frame flags
USER_SPRITE = 0x20
-- register the message parsers so they are automatically called when matching data comes in
data.parsers[USER_SPRITE] = sprite.parse_sprite
-- Main app loop
function app_loop()
frame.display.text('Frame App Started', 1, 1)
frame.display.show()
-- tell the host program that the frameside app is ready (waiting on await_print)
print('Frame app is running')
while true do
rc, err = pcall(
function()
-- process any raw data items, if ready
local items_ready = data.process_raw_items()
-- one or more full messages received
if items_ready > 0 then
if data.app_data[USER_SPRITE] ~= nil then
local spr = data.app_data[USER_SPRITE]
-- set the palette in case it's different to the standard palette
sprite.set_palette(spr.num_colors, spr.palette_data)
-- show the sprite
frame.display.bitmap(1, 1, spr.width, 2^spr.bpp, 0, spr.pixel_data)
frame.display.show()
-- clear the object and run the garbage collector right away
data.app_data[USER_SPRITE] = nil
collectgarbage('collect')
end
end
-- can't sleep for long, might be lots of incoming bluetooth data to process
frame.sleep(0.001)
end
)
-- Catch an error (including the break signal) here
if rc == false then
-- send the error back on the stdout stream and clear the display
print(err)
frame.display.text(' ', 1, 1)
frame.display.show()
break
end
end
end
-- run the main app loop
app_loop()
```
| Selected Examples | Flutter | Lua |
|-------------------|---------|-----|
| Display a Sprite (`simple_frame_app` example) | [Flutter](https://github.com/CitizenOneX/frame_sprite_viewer/blob/main/lib/main.dart){:target="_blank"} | [Lua](https://github.com/CitizenOneX/frame_sprite_viewer/blob/main/assets/frame_app.lua){:target="_blank"} |
---
## Higher-level application scaffolding
In addition to `frame-msg` and `frame-ble`, the Frame developer community has provided some even higher-level scaffolding for creating demo apps and to experiment with ideas quickly, but are not recommended for production apps:
### Simple Frame App
| [](https://pub.dev/packages/simple_frame_app){:target="_blank"} | [API Reference](https://pub.dev/documentation/simple_frame_app/latest/){:target="_blank"} | [Source](https://github.com/CitizenOneX/simple_frame_app){:target="_blank"} |
Quickstart scaffolding for a single-page mobile application that handles basic connection to Frame and loading of Frameside application resources including Lua files and sprites.
| Selected Examples | Flutter | Lua |
|-------------------|---------|-----|
| [Display a Sprite](https://github.com/CitizenOneX/frame_sprite_viewer){:target="_blank"} | [Flutter](https://github.com/CitizenOneX/frame_sprite_viewer/blob/main/lib/main.dart){:target="_blank"} | [Lua](https://github.com/CitizenOneX/frame_sprite_viewer/blob/main/assets/frame_app.lua){:target="_blank"} |
| [Wikipedia Viewer](https://github.com/CitizenOneX/wiki_frame){:target="_blank"} | [Flutter](https://github.com/CitizenOneX/wiki_frame/blob/main/lib/main.dart){:target="_blank"} | [Lua](https://github.com/CitizenOneX/wiki_frame/blob/main/assets/frame_app.lua){:target="_blank"} |
| [Pollinations.AI Image Generation](https://github.com/CitizenOneX/frame_pollinations){:target="_blank"} | [Flutter](https://github.com/CitizenOneX/frame_pollinations/blob/main/lib/main.dart){:target="_blank"} | [Lua](https://github.com/CitizenOneX/frame_pollinations/blob/main/assets/frame_app.lua){:target="_blank"} |
| [Audio Clip Recorder](https://github.com/CitizenOneX/frame_audio_clip){:target="_blank"} | [Flutter](https://github.com/CitizenOneX/frame_audio_clip/blob/main/lib/main.dart){:target="_blank"} | [Lua](https://github.com/CitizenOneX/frame_audio_clip/blob/main/assets/frame_app.lua){:target="_blank"} |
| [Live Streaming Transcription](https://github.com/CitizenOneX/frame_transcribe_googlespeech){:target="_blank"} | [Flutter](https://github.com/CitizenOneX/frame_transcribe_googlespeech/blob/main/lib/main.dart){:target="_blank"} | [Lua](https://github.com/CitizenOneX/frame_transcribe_googlespeech/blob/main/assets/frame_app.lua){:target="_blank"} |
### Frame Vision App
| [](https://pub.dev/packages/simple_frame_app){:target="_blank"} | [API Reference](https://pub.dev/documentation/simple_frame_app/latest/){:target="_blank"} | [Source](https://github.com/CitizenOneX/simple_frame_app){:target="_blank"} |
Even more specialized quickstart scaffolding within the `simple_frame_app` package, designed for computer vision prototyping. In addition to handling connection and application resources on Frame, the Frame Vision App mixin conveniently provides images from the Frame camera directly to your code for custom processing.
| Selected Examples | Flutter | Lua |
|-------------------|---------|-----|
| [Live Camera Feed](https://github.com/CitizenOneX/live_camera_feed){:target="_blank"} | [Flutter](https://github.com/CitizenOneX/live_camera_feed/blob/main/lib/main.dart){:target="_blank"} | [Lua](https://github.com/CitizenOneX/live_camera_feed/blob/main/assets/frame_app.lua){:target="_blank"} |
| [Hotdog or not hotdog](https://github.com/CitizenOneX/frame_vision_hotdog){:target="_blank"} | [Flutter](https://github.com/CitizenOneX/frame_vision_hotdog/blob/main/lib/main.dart){:target="_blank"} | [Lua](https://github.com/CitizenOneX/frame_vision_hotdog/blob/main/assets/frame_app.lua){:target="_blank"} |
| [Mobile Image Classification](https://github.com/CitizenOneX/frame_vision_classification){:target="_blank"} | [Flutter](https://github.com/CitizenOneX/frame_vision_classification/blob/main/lib/main.dart){:target="_blank"} | [Lua](https://github.com/CitizenOneX/frame_vision_classification/blob/main/assets/frame_app.lua){:target="_blank"} |
| [Mobile Vision Translation](https://github.com/CitizenOneX/frame_vision_translation){:target="_blank"} | [Flutter](https://github.com/CitizenOneX/frame_vision_translation/blob/main/lib/main.dart){:target="_blank"} | [Lua](https://github.com/CitizenOneX/frame_vision_translation/blob/main/assets/frame_app.lua){:target="_blank"} |
### “Mobile app with no mobile coding”
| [Mobile App](https://github.com/CitizenOneX/frame_vision_api){:target="_blank"} | [Sample API Backend](https://github.com/CitizenOneX/frame_vision_api_impl){:target="_blank"}
Just want to code your computer vision backend in Python, but want a mobile app experience? Use this simple mobile app as-is (or customize) and point it to your own API endpoint for image processing, sending the result back to Frame for display.
---
## Legacy SDKs
Note: The legacy SDK package is available for [frame-sdk](https://pub.dev/packages/frame_sdk) as [previously documented here](https://github.com/brilliantlabsAR/docs/blob/c33420dc55eb12b27f5a804b9a5a82247d471ae9/frame/building-apps-sdk.md).
In order to allow richer experiences on Frame including image display and audio streaming, the decision was made to move to an SDK model based on asynchronous message-passing between a main application loop running on the host, and a main event loop running on Frame. This approach is used in both the [Python](https://pypi.org/project/frame-msg/) and [Flutter](https://pub.dev/packages/frame_msg) SDKs.
While this requires a slight adjustment from the way the legacy SDKs were used, there are many examples provided (e.g. [Sprite Viewer](https://github.com/CitizenOneX/frame_sprite_viewer), [Unicode Text Display](https://github.com/CitizenOneX/frame_textspriteblock), [Teleprompter](https://github.com/CitizenOneX/frame_teleprompter), [Mobile Image Classifier](https://github.com/CitizenOneX/frame_vision_classification), [Realtime Multimodal Assistant](https://github.com/brilliantlabsAR/frame_realtime_gemini_voicevision)) and a [helpful community in Discord](https://discord.com/invite/vDS9X7gdwg) to help you build your project.
========================================================================
PAGE: Lua API Reference (https://docs.brilliant.xyz/frame/frame-sdk-lua/)
DESCRIPTION: A reference of Lua functionality available on your Frame AR glasses.
========================================================================
# Lua API
{: .no_toc }
---
Lua is a tiny and extensible scripting language that's designed to be power efficient and quick to learn. Frame features a complete Lua virtual machine based on the latest public release of Lua. Dedicated hardware APIs allow direct access to all of Frame's peripherals at a high level so that developers can start building apps quickly and easily.
{: .note }
Note that the Lua virtual machine on the Frame has a subset of the standard library, so some guides on the internet about Lua may contain code that won't work on Frame without modification. Specifically, Lua's standard `io` and `os` libraries are not present on Frame.
There's no special cables or setup needed. Lua on Frame is accessed solely over Bluetooth, such that any user created host app can easily execute scripts by simply pushing Lua strings to the device. To learn more how the underlying Bluetooth communication with Frame works, check out the [Talking to the Frame over Bluetooth](/frame/frame-sdk-bluetooth-specs) page.
---
## Library reference
{: .no_toc }
This page describes all of the Frame specific Lua APIs available to the developer along with some helpful examples. Certain libraries allow for more low level access that can be used for debugging and hacking the various subsystems of Frame.
{: .note }
The API specification is still undergoing heavy development. Some of them may change over time.
1. TOC
{:toc}
---
### Display
The display engine allows drawing of text, sprites and vectors. These elements can be layered atop one another simply in the order they are called, and then be displayed in one go using the `show()` function.
The Frame display is capable of rendering up to 16 colors at one time. These colors are preset by default, however each color can be overridden.
{: .note }
The vector command is not yet implemented.
| API | Description |
|:---------|:------------|
| `frame.display.text(string, x, y, {color='WHITE', spacing=4})` | Prints the given `string` to the display at `x` and `y`. A `color` can optionally be provided to print the text in one of the [16 palette colors](#color-palette). `spacing` can optionally be provided to adjust the character spacing of the printed text. [Details below](#displaying-text)
| `frame.display.bitmap(x, y, width, color_format, palette_offset, data)` | Prints raw bitmap data to the display at coordinates `x` and `y`. `width` should be the width of the bitmap. `color_format` should be either `2`, `4`, or `16`. `palette_offset` offsets the colors indexed from the palette. `data` should be a string containing the bitmap data. [Details below](#sprite-engine)
| `frame.display.vector()` | *Coming soon*
| `frame.display.show()` | Shows the drawn objects on the display. See [below](#buffering) for more details on how buffering works.
#### Buffering
{: .no_toc }
The Frame display has 2 buffers. All writing to the display via `frame.display.text()`, `frame.display.bitmap()`, etc write to an off-screen buffer and are not visible. This allows you to write multiple actions at once. When you have completed drawing and want to show it to the user, call `frame.display.show()` which will display the buffered graphics and clear a new off-screen buffer for whatever you want to draw next.
#### Displaying Text
{: .no_toc }
`frame.display.text(string, x, y, {color='WHITE', spacing=4})` prints the given `string` to the display with its upper-left at position `x, y`. All positions are 1-indexed, so possible values for `x` are between 1 and 640, and possible values for `y` are between 1 and 400. Text is variable width, not fixed-width. Currently it is not possible to modify the font or font size. There is no word-wrapping performed automatically.
A `color` can optionally be provided to print the text in one of the [16 palette colors](#color-palette). `spacing` can optionally be provided to adjust the character spacing of the printed text. The final argument may be omitted, in which case the default color of `WHITE` and spacing of 4 is used.
```lua
-- Display 'Hello world' at x = 50 and y = 100
frame.display.text('Hello world', 50, 100)
-- Display 'Goodbye world' in red and with more spacing
frame.display.text('Goodbye world', 50, 200, {color='RED', spacing=16})
-- Show the buffered text
frame.display.show()
```
#### Sprite Engine
{: .no_toc }
`frame.display.bitmap(x, y, width, color_format, palette_offset, data)` allows manually drawing to the screen. The bitmap is positioned with its upper-left at `x, y` with width `width` and the height automatically determined by the length of the data. `color_format` can be one of 2, 4, or 16. By including less colors in your bitmap, you can fit more pixels into a smaller data string. `palette_offset` is a number between 0 and 15, where 0 means no offset.
The sprite engine in Frame is capable of quickly rendering bitmap data to anywhere on the screen. Sprite data can be stored in one of three different color formats. 2 color, 4 color, and 16 color. 2 color mode will only use the first two colors in the color palette, but allows storing 8 pixels per byte of sprite data. 4 color will use the first four colors in the palette, but requires twice as much data per pixel. Finally, 16 color mode allows accessing the entire color palette, but requires 4 bits per pixel. Pixel data in Lua is simply represented as a long string of all the pixels. The `width` parameter tells the sprite engine when to move to the next line when rendering out each pixel from the string.
Each pixel represented by the pixel data simply indexes one of the colors from the color palette. For 2 color mode, a bit (pixel) value of `1` will print a pixel of color `WHITE`. The internal font glyphs used by the `text()` function are essentially all 2 color sprites.
Palette Offset Example
To achieve different color drawings, the `palette_offset` feature is used. This value offsets how the colors are indexed during the render. Using the same 2 color example as above, but combined with a `palette_offset` value of 3, now indexes `PINK` instead of `WHITE` for all pixel values of `1`. The same works for all the other color modes. Note that the `VOID` color is never shifted. A pixel value of `0` will always index `VOID`, no matter the `palette_offset`.
The example below shows how a single sprite can be shown in different colors using the `palette_offset` feature. Note how the color palette [has been adjusted](#low-level-display-commands) to repeat the same colors after index 5, but with red changed to green.

The `data` is a lua string which is just an array of bytes, but with multiple pixels packed in each byte based on the number of colors. When drawing, the `palette_offset` is added to palette index (wrapping around at 16).
Data String Detailed Examples
```plaintext
Data as Lua string:
"\x01\xFE"
Data as bits:
00000001 11111110
If num_color = 16, then this maps to 4 pixels:
as bits: 0000 0001 1111 1110
palette index: 0 1 15 14
If num_color = 4, then this maps to 8 pixels:
as bits: 00 00 00 01 11 11 11 10
palette index: 0 0 0 1 3 3 3 2
If num_color = 2, then this maps to 16 pixels:
as bits: 0 0 0 0 0 0 0 1 1 1 1 1 1 1 1 0
palette index: 0 0 0 0 0 0 0 1 1 1 1 1 1 1 1 0
```
For example, to draw a red rectangle at position x = 100, y = 50, with width = 32 and height = 15:
```lua
frame.display.bitmap(100, 50, 32, 2, 3, string.rep("\xFF", 32 / 8 * 16))
| | | | | |"Since each byte maps to 8 pixels, we divide the width 32 by 8"
| | | | | \"and multiply by the height of 16 to get the total data length."
| | | | | "We fill that data with "\xFF" (aka 255), to fill all pixels."
| | | | \"the 3rd color in the standard palette is red"
| | | \"we only need 2 color options, to pack 8 pixels per byte"
| | \"the width is 32, after which it rolls onto the next line"
| \"top at 50px"
\"left at 100px"
```
#### Color Palette
{: .no_toc }
The Frame display is capable of rendering up to 16 colors at a time. Each color is indexed 0-15, and are named in the following order: `VOID`, `WHITE` ,`GREY` ,`RED` ,`PINK` ,`DARKBROWN` ,`BROWN` ,`ORANGE` ,`YELLOW` ,`DARKGREEN` ,`GREEN` ,`LIGHTGREEN` ,`NIGHTBLUE` ,`SEABLUE` ,`SKYBLUE` or `CLOUDBLUE`. `VOID` represents the background (normally black) color. Each color can be overridden per frame to any 10bit YCbCr color from the colorspace shown below. This space contains a total of 1024 possible colors.
Frame display YCbCr colorspace

The `assign_color()` function simplifies color selection by allowing the user to enter regular 24bit RGB values which are internally converted to the YCbCr colorspace. Note however that the color actually rendered will be rounded to one of the above colors.
Here's the default palette, as names and indices:
#0 VOID
#1 WHITE
#2 GRAY
#3 RED
#4 PINK
#5 DARKBROWN
#6 BROWN
#7 ORANGE
#8 YELLOW
#9 DARKGREEN
#10 GREEN
#11 LIGHTGREEN
#12 NIGHTBLUE
#13 SEABLUE
#14 SKYBLUE
#15 CLOUDBLUE
#### Low-Level Display Commands
{: .no_toc }
| Low level functions | Description |
|:---------|:------------|
| `frame.display.assign_color(color, r, g, b)` | Changes the rendered color in slot `color` with a new color given by the components `r`, `g,` and `b`. Valid options for `color` are: `VOID`, `WHITE` ,`GREY` ,`RED` ,`PINK` ,`DARKBROWN` ,`BROWN` ,`ORANGE` ,`YELLOW` ,`DARKGREEN` ,`GREEN` ,`LIGHTGREEN` ,`NIGHTBLUE` ,`SEABLUE` ,`SKYBLUE` or `CLOUDBLUE`. Note that changing the `VOID` color will change the rendered background color of the display. The RGB components are internally converted to a 10bit YCbCr value that represents the true colorspace of the display. There may therefore be rounding errors for certain RGB combinations
| `frame.display.assign_color_ycbcr(color, y, cb, cr)` | Same as above, however the `y`, `cb`, and `cr` represent the true 10bit colorspace of the display. Each component has a range of 4, 3, and 3 bits respectively
| `frame.display.set_brightness(brightness)` | Sets the brightness of the display. Valid options for `brightness` are `-2`, `-1`, `0`, `1`, or `2`. Note that higher brightness levels increase the likelihood of burn-in if static pixels are shown for long periods of time on the display
| `frame.display.write_register(register, value)` | Allows hacking of the display registers. `register` and `value` should both be 8bit values
| `frame.display.power_save(enable)` | When `enable` is set to `true`, the display will enter power saving mode and turn off. This feature may be used to save battery life when the display is not needed. Graphics rendering commands may still be issued and will be shown as normal when `enable` is set back to false. Note that the display will sleep and wake up automatically when using `frame.sleep()` so this function isn't needed in most cases
---
### Camera
The camera capability of Frame allows for capturing and downloading single JPEG images over Bluetooth. The sensor's full resolution is 1280x720 pixels in portrait orientation, however only square images up to 720x720 pixels can be captured at a time. The user can select which portion of the sensor's 1280 length is captured using the `pan` control. Additionally, the resolution of the capture can be cropped down to 100x100 pixels by using the `resolution` function. To control file size and download speed, the `quality` option can be used to adjust the JPEG compression quality.
| API | Description |
|:---------|:------------|
| `frame.camera.capture{resolution=512, quality='VERY_HIGH', pan=0}` | Captures a single image from the camera. The `resolution` option may be any even number between 100 and 720. The `pan` option can be any number between -140 and 140, where 0 represents a centered image. `quality` can be either `VERY_LOW`, `LOW`, `MEDIUM`, `HIGH`, or `VERY_HIGH`. Higher quality and resolution images will increase the image file size.
| `frame.camera.image_ready()` | Following a capture, polling `image_ready()` will return `false` while the image is being captured. Once `image_ready()` returns true, the image can be safely read out
| `frame.camera.read(num_bytes)` | Reads out a number of bytes from the camera capture memory as a byte string. Once all bytes have been read, `nil` will be returned. Note that reading data out too quickly following a capture may return corrupted data. The `image_ready()` function should be used to ensure the image is ready before reading anything out
| `frame.camera.read_raw(num_bytes)` | The same as `camera.read()` however skips the JPEG header data and only returns the image data and final JPEG footer. This function can be used to speed up data transfer since the JPEG header between images is the same if the `resolution` and `quality` values remain unchanged. It's first recommended to read an image normally using `camera.read()` and then extract the JPEG header (always the first 623 bytes) so that it can be used for subsequent `camera.read_raw()` operations
| `frame.camera.auto{metering='CENTER_WEIGHTED', exposure=0.1, exposure_speed=0.45, shutter_limit=16383, analog_gain_limit=16, white_balance_speed=0.5, rgb_gain_limit=287}` | Runs the automatic exposure, gain and white balance algorithm. This function must be called every 100ms for the best performance. `metering` can be one of three modes, `SPOT`, `CENTER_WEIGHTED`, or `AVERAGE`. `exposure` can be a value between `0.0` and `1.0` where lower values will return darker images, and higher values will return brighter images. `exposure_speed` and `white_balance_speed` control how aggressively the algorithm will attempt to correct for the exposure and white balance respectively. Higher values will result in a faster convergence, but may create additional overshoot or oscillation of the image brightness or color balance. `shutter_limit` and `analog_gain_limit` will cap the maximum shutter and gain values. Reducing these values may be used to reduce motion blur and image noise respectively. Shutter is always prioritized over gain. When going into darker scenes, the shutter will first increase, and once it has reached the `shutter_limit`, the gain will then begin to increase. Likewise, when going into brighter scenes, the gain will decrease to zero first, and only then will the shutter decrease. `rgb_gain_limit` constrains `red_gain`, `green_gain` and `blue_gain` to be capped at a value less than the maximum (1023) to reduce the amplification of noise. This function returns a table of statistics related to the scene and current algorithm state. Many aspects of shutter, gain and white balance may be monitored by reading the table.
#### Example
{: .no_toc }
```lua
local mtu = frame.bluetooth.max_length()
-- Auto expose for 3 seconds
for _=1, 30 do
frame.camera.auto{}
frame.sleep(0.1)
end
-- Capture an image using default settings
frame.camera.capture{}
-- Wait for the image to be ready
while frame.camera.image_ready() == false do
-- do nothing
end
while true do
local data = frame.camera.read(mtu)
if data == nil then
break
end
frame.bluetooth.send(data)
end
```
#### Low-Level Camera Commands
{: .no_toc }
| Low level functions | Description |
|:---------|:------------|
| `frame.camera.set_exposure(shutter)` | Sets the shutter value manually. Note that `camera.auto{}` will override this value. `shutter` can be a value between `4` and `16383`
| `frame.camera.set_gain(gain)` | Sets the gain value manually. Note that `camera.auto{}` will override this value. `gain` can be a value between `1` and `248`
| `frame.camera.set_white_balance(r, g, b)` | Sets the digital gains of the R, G and B channels for fine tuning white balance. `r`, `g` and `b` can be values between `0` and `1023`
| `frame.camera.write_register(address, value)` | Allows for hacking the camera's internal registers. `address` can be any 16-bit register address of the camera, and `value` any 8-bit value to write to that address
| `frame.camera.read_register(address, value)` | Reads back a value from the camera's internal registers. `address` can be any 16-bit register address of the camera. The 8bit value of the register will be returned
| `frame.camera.power_save(enable)` | When `enable` is set to `true`, the camera will enter power saving mode and turn off. This feature may be used to save battery life when the camera is not needed. When this mode is enabled, the only available camera functions will be `camera.read()` and `camera.read_raw()`. Note that the camera will sleep and wake up automatically when using `frame.sleep()` so this function isn't needed in most cases
---
### Microphone
The microphone on Frame allows for streaming audio to a host device in real-time. Transfers are limited by the Bluetooth bandwidth which is typically around 40kBps under good signal conditions. The audio bitrate for a given `sample_rate` and `bit_depth` is: `sample_rate * bit_depth / 8` bytes per second. An internal 32k buffer automatically compensates for additional tasks that might otherwise briefly block Bluetooth transfers. If this buffer limit is exceeded however, then discontinuities in audio might occur.
| API | Description |
|:---------|:------------|
| `frame.microphone.start{sample_rate=8000, bit_depth=8}` | Starts streaming mic data into the internal 32k buffer. `sample_rate` may be either `8000`, or `16000`, and `bit_depth` may be either `8`, `16` (both return signed ints; 16-bit is little-endian)
| `frame.microphone.stop()` | Stops the stream
| `frame.microphone.read(num_bytes)` | Reads out a number of bytes from the buffer. If all bytes have been read, but streaming is still active, an empty string will be returned. Once the stream has been stopped and all bytes have been read, then `nil` will be returned
#### Example
{: .no_toc }
```lua
local mtu = frame.bluetooth.max_length()
frame.microphone.start{sample_rate=16000} -- Start streaming at 16kHz 8bit
-- Streams forever
while true do
data = frame.microphone.read(mtu)
-- Calling frame.microphone.stop() will allow this to break the loop
if data == nil then
break
end
-- If there's data to send then ...
if data ~= '' then
-- Try to send the data as fast as possible
while true do
-- If the Bluetooth is busy, this simply tries again until it gets through
if (pcall(frame.bluetooth.send, data)) then
break
end
end
end
end
```
---
### Motion sensor (IMU)
The IMU API allows reading both accelerometer and compass data, as well as assigning a callback function for tap gestures.
The tap gesture will always wake up Frame from `frame.sleep()`.
| API | Description |
|:---------|:------------|
| `frame.imu.direction()` | Returns a table containing the `roll`, `pitch` and `heading` angles of the wearer's head position
| `frame.imu.tap_callback(handler)` | Assigns a callback to the tap gesture. `handler` must be a function, or can be `nil` to deactivate the callback
| Low level functions | Description |
|:---------|:------------|
| `frame.imu.raw()` | Returns a table of the raw `accelerometer` and `compass` measurements. Each containing a table with `x`, `y`, and `z` values
#### Example
{: .no_toc }
```lua
print(frame.imu.direction()['pitch']) -- Prints the angle of the wearer's head (up or down)
function tapped() -- Prints 'tapped' whenever the user taps the side of their Frame
print('tapped')
end
frame.imu.tap_callback(tapped)
```
---
### Bluetooth
The Bluetooth API allows for sending and receiving raw byte data over Bluetooth. For a full description of how this can be used, check out the [Talking to the Frame over Bluetooth](/frame/frame-sdk-bluetooth-specs) page.
| API | Description |
|:---------|:------------|
| `frame.bluetooth.address()` | Returns the device MAC address as a 17 character string. E.g. `4E:87:B5:0C:64:0F`
| `frame.bluetooth.receive_callback(handler)` | Assigns a callback to handle received Bluetooth data. `handler` must be a function, or can be `nil` to deactivate the callback
| `frame.bluetooth.max_length()` | Returns the maximum length of data that can be sent or received in a single transfer
| `frame.bluetooth.send(data)` | Sends data to the host device. `data` must be a string, but can contain byte values including 0x00 values anywhere in the string. The total length of the string must be less than or equal to `frame.bluetooth.max_length()`
#### Example
{: .no_toc }
```lua
function get_data(data) -- Called every time byte data arrives to Frame
print(data)
end
frame.bluetooth.receive_callback(get_data)
frame.bluetooth.send('\x10\x12\x00\xFF') -- Sends the bytes: 0x10, 0x12, 0x00, 0xFF to the host
```
---
### File system
The file system API allows for writing and reading files to Frame's non-volatile storage. These can include executable Lua scripts, or other user files.
| API | Description |
|:---------|:------------|
| `frame.file.open(filename, mode)` | Opens a file and returns a file object. `filename` can be any name, and `mode` can be either `'read'`, `'write'`, or `'append'`
| `frame.file.remove(name)` | Removes a file or directory of given `name`
| `frame.file.rename(name, new_name)` | Renames a file or directory of given `name` to `new_name`
| `frame.file.listdir(directory)` | Lists all files in the directory path given. E.g. `'/'` for the filesystem root directory. The list is returned as a table with `name`, `size`, and `type`
| `frame.file.mkdir(pathname)` | Creates a new directory with the given `pathname`
| `f:read(*num_bytes)` | Reads a number of bytes from a file. If no argument is given, the whole line is returned
| `f:write(data)` | Writes data to the file. `data` must be a string and can contain any byte data
| `f:close()` | Closes the file. It is important to close files once done writing, otherwise they may become corrupted
#### Tips
{: .no_toc }
* On many online Lua guides, the examples allow `'r'`, `'w'`, or `'a'` as shorthand for `'read'`, `'write'`, or `'append'`, however Frame does not support that. You need to spell out the whole word.
* GitHub Copilot and ChatGPT will always generate incorrect code like `file.read()` rather than the correct `f:read()`. Keep a close eye on the syntax.
* `f:read()` reads until the end of the line, so you need to call it multiple times to get through the whole file. It will return `nil` when it has reached the end of the file.
* There is no function to check if a file exists. Instead you can try to open the file for reading and see if it fails.
{: .warning }
There is [an open bug](https://github.com/brilliantlabsAR/frame-codebase/issues/234) where `f:read(*num_bytes)` will not always respect the num_bytes limit. Until that is resolved, your code should handle receiving up to 512 bytes at a time.
#### Example
{: .no_toc }
```lua
frame.file.mkdir('/my_files') -- Make a new directory
f = frame.file.open('/my_files/log.txt', 'write') -- Create a new file (or overwrite if it exists)
f:write('Log:\n')
f:close()
f = frame.file.open('/my_files/log.txt', 'append') -- Append two lines to the file
f:write('Logged a new line\n')
f:close()
f = frame.file.open('/my_files/log.txt', 'append')
f:write('Logged another line\n')
f:close()
-- Print the file contents (this simple version will fail if a line is longer than the MTU limit)
f = frame.file.open('/my_files/log.txt', 'read')
while true do
local line = f:read()
if line == nil then
break
end
print(line)
end
f:close()
-- Print all the files in the directory
local files = frame.file.listdir('/my_files')
for index, data in ipairs(files) do
print(index)
for key, value in pairs(data) do
print('\t', key, value)
end
end
```
---
### Compression
The compression library allows for working with LZ4 compressed data. Currently, only decompression is supported.
| API | Description |
|:---------|:------------|
| `frame.compression.decompress(data, block_size)` | Decompresses the given LZ4 compressed data in `data`. `block_size` is the block size value that was chosen when compressing the data
| `frame.compression.process_function(function)` | Assigns a callback to handle the decompressed data. `function` must be a function, or can be `nil` to deactivate the callback. The function will receive the decompressed data with a length of `block_size` and will be called several times until all the data has been decompressed
#### Example
{: .no_toc }
```lua
-- Decompression function
function decomp_func(data)
print(data) -- Print the decompressed data
end
-- Register the decompression function
frame.compression.process_function(decomp_func)
-- Function to handle the compressed data received from Bluetooth
function ble_func(data)
frame.compression.decompress(data, 1024)
end
-- Register the Bluetooth receive callback
frame.bluetooth.receive_callback(ble_func)
```
#### Compressing data
The LZ4 utility on the host machine can be used to compress data for sending to Frame.
```sh
lz4 -9 -B1024 input.txt output.lz4
```
The `-9` flag sets the compression level to 9, and the `-B1024` flag sets the block size to 1024 bytes. Some experimentation may be needed to find the optimal compression level and block size for a given use case.
The bytes in output.lz4 can be sent to Frame over the data channel, or saved to a file on Frame's filesystem for use later. Note that decompressing from the filesystem is currently not supported. The data must be loaded into a Lua string variable first before decompressing.
#### Frameutils example
The following example demonstrates how to decompress data using `frameutils`
```python
import asyncio
from frameutils import Bluetooth
async def main():
b = Bluetooth()
await b.connect(print_response_handler=lambda s: print(s))
# Upload the Lua script
lua_script = """
function decomp_func(data)
print(data)
end
frame.compression.process_function(decomp_func)
function ble_func(data)
frame.compression.decompress(data, 1024)
end
frame.bluetooth.receive_callback(ble_func)
"""
await b.upload_file(lua_script, "main.lua")
await b.send_reset_signal()
await asyncio.sleep(1)
# Send the compressed data. Here the total size of the data is is pretty small,
# but usually you would want to split the data into MTU sized chunks and stitch
# them together on the device side before decompressing.
compressed_data = bytearray(
b"\x04\x22\x4d\x18\x64\x40\xa7\x6f\x00\x00\x00\xf5\x3d\x48\x65\x6c\x6c\x6f\x21\x20\x49\x20\x77\x61\x73\x20\x73\x6f\x6d\x65\x20\x63\x6f\x6d\x70\x72\x65\x73\x73\x65\x64\x20\x64\x61\x74\x61\x2e\x20\x49\x6e\x20\x74\x68\x69\x73\x20\x63\x61\x73\x65\x2c\x20\x73\x74\x72\x69\x6e\x67\x73\x20\x61\x72\x65\x6e\x27\x74\x20\x70\x61\x72\x74\x69\x63\x75\x6c\x61\x72\x6c\x79\x3b\x00\xf1\x01\x69\x62\x6c\x65\x2c\x20\x62\x75\x74\x20\x73\x70\x72\x69\x74\x65\x49\x00\xa0\x20\x77\x6f\x75\x6c\x64\x20\x62\x65\x2e\x00\x00\x00\x00\x5f\xd0\xa3\x47"
)
await b.send_data(compressed_data)
await b.send_break_signal()
await b.disconnect()
asyncio.run(main())
```
---
### Time functions
The time functions allow for accurate timekeeping on Frame. The `utc()` function can be used to set the time on Frame using a UTC timestamp. Frame will then keep the time until it's put back onto charge, or placed into deep sleep using `frame.sleep()`. The `date()` function can be used to return a human readable time and date.
| API | Description |
|:---------|:------------|
| `frame.time.utc(*timestamp)` | Sets or gets the current time. `timestamp` can be provided as a UTC timestamp to set the internal real-time clock. If no argument is given, Frame's current time is returned as a UTC timestamp. If no timestamp was initially set, this number will simply represent the powered on time of Frame in seconds.
| `frame.time.zone(*offset)` | Sets or gets the timezone offset. If `offset` is given, the timezone will be set, otherwise the currently set timezone is returned. The format of the timezone should be a string, e.g. '-7:00', or '5:30'.
| `frame.time.date(*timestamp)` | Returns a table containing `second`, `minute`, `hour`, `day`, `month`, `year`, `weekday`, `day of year`, and `is daylight saving`. If the optional `timestamp` argument is given, that timestamp will be used to calculate the corresponding date.
#### Example
{: .no_toc }
```lua
frame.time.utc(1708551112) -- Set the current time to Wed Feb 21 2024 21:31:52 UTC
frame.time.zone('-7:00') -- Set the timezone to pacific time
local time_now = frame.time.date()
-- print the local time and date
print(time_now['hour'])
print(time_now['minute'])
print(time_now['month'])
print(time_now['day'])
```
---
### System functions
The system API provides miscellaneous functions such as `sleep` and `update`. It also contains some low level functions which are handy for developing apps and custom FPGA images.
| API | Description |
|:---------|:------------|
| `frame.HARDWARE_VERSION` | Returns the current hardware version as a string. E.g. `'Frame'`
| `frame.FIRMWARE_VERSION` | Returns the current firmware version as a 12 character string. E.g. `'v24.046.1546'`
| `frame.GIT_TAG` | Returns the current firmware git tag as a 7 character string. E.g. `'4a6ea0b'`
| `frame.battery_level()` | Returns the battery level as a percentage between `1` and `100`
| `frame.sleep(*seconds)` | Sleeps for a given number of seconds. `seconds` can be a decimal number such as `1.25`. If no argument is given, Frame will go to sleep until a tap gesture wakes it up
| `frame.update()` | Reboots Frame into the firmware bootloader. Check the [firmware updates](/frame/frame-sdk#firmware-updates) section of the Building Apps page to see how this is used
| Low level functions | Description |
|:---------|:------------|
| `frame.stay_awake(enable)` | Prevents Frame from going to sleep while it's docked onto the charging cradle. This can help during development where continuous power is needed, however may degrade the display or cause burn-in if used for extended periods of time
| `frame.fpga_read(address, num_bytes)` | Reads a number of bytes from the FPGA at the given address
| `frame.fpga_write(address, data)` | Writes data to the FPGA at a given address. `data` can be a string containing any byte values
---
## AR Studio
{: .no_toc }
While the main way you'll use Lua on Frame is via host apps that send it over Bluetooth, it can be helpful while learning to directly write and execute Lua code on Frame using the AR Studio extension for VSCode.
AR studio is an extension for VSCode designed for both Frame and Monocle. It lets you quickly start writing apps and testing them on your device. Download it [here](https://marketplace.visualstudio.com/items?itemName=brilliantlabs.brilliant-ar-studio), or simply search for Brilliant AR Studio from within the VSCode extensions tab.

Once you have AR Studio installed, you can try an example using the following steps:
1. Open the Command Palette using **Ctrl-Shift-P** (or **Cmd-Shift-P** on Mac)
1. Type and select **Brilliant AR Studio: Initialize new project folder**
1. Select Frame, and give your project a name
1. Copy the following example code into `main.lua`:
```lua
function change_text()
frame.display.text('Frame tapped!', 50, 100)
frame.display.show()
end
frame.imu.tap_callback(change_text)
frame.display.text('Tap the side of Frame', 50, 100)
frame.display.show()
```
1. Save the file, and press the **Connect** button
1. VSCode will then connect to your Frame (You may need to accept pairing if you aren't already paired)
1. Right click on `main.lua` and select **Upload to device**
1. Your app should now be running on Frame
---
========================================================================
PAGE: Talking to Frame Over Bluetooth (https://docs.brilliant.xyz/frame/frame-sdk-bluetooth-specs/)
DESCRIPTION: A reference on how to manually communicate with Frame over Bluetooth Low Energy
========================================================================
# Talking to Frame Over Bluetooth
{: .no_toc }
---
You may want to communicate with Frame manually over Bluetooth Low Energy if we don't yet have an SDK available for your preferred development language, or if you just want to have full control of what's going on under the hood.
Once you're communicating with Frame over Bluetooth, you can use the [Lua API Reference](/frame/frame-sdk-lua) to see everything you can tell it to do.
1. TOC
{:toc}
---
## Pairing & Connecting
Frame uses BLE bonding and must pair with a host device before any communication can take place. When attempting to connect to Frame using an SDK, Frame will automatically initiate pairing, which the OS handles and the user will have to agree to.
Full Bluetooth Connection Details
### Un-Pairing
If already paired, Frame must be reset using the pinhole button on the charging dock before it can be paired to a new host side device. Host-side devices must also remove previous bonding before a new bonding can be accepted.
### Bluetooth Connection Technical Diagram

## Bluetooth Service & Characteristics
Frame has a single BLE service containing two characteristics: one for transmitting and one for receiving data.
Lua strings can be sent on the TX characteristic as UTF-8 strings, and responses are returned back on the RX characteristic. The host device must enable notification on the RX characteristic in order to receive data.
- Service UUID: 7A230001-5475-A6A4-654C-8431F6AD49C4
- TX characteristic UUID: 7A230002-5475-A6A4-654C-8431F6AD49C4
- RX characteristic UUID: 7A230003-5475-A6A4-654C-8431F6AD49C4
## Executing Lua Statements Over Bluetooth
You can run Lua commands on Frame over Bluetooth using a REPL-like interaction. Frame does not contain a complete Lua REPL, but rather evaluates every message and only returns a message if it resulted in the Lua `print()` function being called, or an error.
```lua
print('hello world') -- Returns 'hello world' on the RX characteristic
print(1 + 2) -- Returns 3
a = 1 + 2 -- Evaluates 1 + 2 and stores it in a, but does not return anything
1 + 2 -- Returns an error because 1 + 2 hasn't been assigned to anything
```
The length of TX data is limited to a maximum size of the host's chosen MTU length. This number also determines the maximum length of a Lua string that can be evaluated at a time. For larger scripts, they must first be saved to the device using the [file system API](/frame/frame-sdk-lua#file-system) using several `f:write()` operations, and then executed using `require()`.
Responses are also limited to the MTU length. Should you want to return very long strings, they should be broken up into smaller `print()` statements.
Common MTU lengths are from 27 to 251 bytes, depending on OS version, BT version, and more. To determine the MTU length that applies to your connection, use the following Lua function on Frame: `frame.bluetooth.max_length()`. More details in the [Lua Bluetooth API reference](/frame/frame-sdk-lua#bluetooth). To determine the MTU length on the host side, consult the documentation for your bluetooth library.
### Bluetooth Lua Execution Sequence Diagram

## Sending Data
Sometimes it may be more efficient to send raw byte data rather than strings: for example, when transmitting graphical or microphone data. These can be sent on the same TX characteristic by simply prepending a byte of value `0x01` at the start of the payload. This will trigger a callback function if one has already been assigned by `frame.bluetooth.receive_callback()`. The total length of byte data that can be transmitted is therefore MTU - 4 bytes.
Raw byte data can also be returned to the host device using the `frame.bluetooth.send()` function. This data is also limited to MTU - 4 bytes in length, and will be prepended by a value of `0x01` in the first byte of the payload.
### Bluetooth Raw Data Exchange Sequence Diagram

## Control Characters
While a Lua script is running, Frame will ignore any other Lua strings that are sent over Bluetooth (except [raw byte data](#sending-data) which can still be sent to trigger callbacks in the user logic - see below). To interrupt a running script, the following control signals can be sent on the TX characteristic to exit or restart the script:
- Sending a single byte of value `0x03` ("break signal") will terminate any running script or loop.
- Sending a single byte of value `0x04` ("reset signal") will clear all variables, and run `main.lua` if it exists. Equivalent to a reboot, or dipping in and out of the charging cradle.
## Lua Main Loop - A Special Case
The Lua command `require('my_module')` executes the whole file `my_module.lua`. If this file contains a main loop, it may never return. Any subsequent Lua command sent on the TX characteristic *will not execute in the REPL* because the previous command has not returned - however raw data transmitted (with the `0x01` prefix) will still be handled by the `receive_callback()`.
**This behavior is the basis of Frameside applications**: when a Lua file is sent to Frame and then run (`require`d), Frame no longer accepts individual Lua REPL commands, but thereafter all communication between the Host and Frame takes place with raw data messages on the TX characteristic (with the `0x01` prefix). The primary purpose of the Lua main loop (in conjunction with the data characteristic `receive_callback()`) is to receive messages from the Host and trigger corresponding Frameside behavior. In addition, data from Frame can be sent back on the RX characteristic (RX from the point of view of the Host) to trigger its action.
For example, an application that takes photos from Frame's camera, sends them to the Host, runs a vision model, and then sends a text caption to Frame, might require a main Lua loop that receives 2 message types from the host: (1) capture a photo (and send to Host), and (2) display the specified text. The `frame-msg` package in the Frame SDK works precisely in this way.
Lua loops can be interrupted with the break and reset signals outlined in the section above: [Control Characters](#control-characters). When first connecting to Frame, it may not be known in advance if a main loop is already running, so a program may need to send a break signal to break out of any running loop to ensure that subsequent Lua REPL statements execute (e.g. to send new application files.)
Note: if a file named `main.lua` exists on the filesystem, it will automatically be run (`require`d) after reboot (or reset signal). If that file has a main loop, a break control character will need to be sent after the reboot (and after a short delay) to ensure that further Lua commands can be successfully executed.
## Firmware Updates
Frame contains a mechanism for updating the complete system firmware via a built in bootloader. To enter the bootloader, call `frame.update()`. The device will then reboot and advertise with the name "Frame Update".
To understand how the bootloader process works in more detail, visit the [Nordic DFU documentation](https://infocenter.nordicsemi.com/topic/sdk_nrf5_v17.1.0/lib_bootloader_modules.html).
If no activity commences on the bootloader for more than 5 minutes, it will timeout and return back to the application firmware. If the firmware update process is interrupted, and the application firmware becomes invalid, the bootloader will wait forever until a valid firmware update is completed.
Unlike the application firmware, the bootloader will continue to operate even while Frame is on charge. It's therefore possible to update while the device is docked to the charging cradle. In this case, once the update completes, the firmware will reload and then go to sleep right away.
The latest release file of the official firmware is available from the [Frame codebase releases page](https://github.com/brilliantlabsAR/frame-codebase/releases) which you can include in your own host apps along with the DFU mechanism.